

 русский
  Español
 -
How Can a Manifold Bracket Improve System Performance

Mar 06, 2026
How a Manifold Bracket Really Helps HVAC Systems Stay Stable — A Practical Guide
When people design HVAC systems they often spend most time on pumps, valves and controllers. That's natural. But if the supporting parts aren't right, all that careful equipment selection can be undone by vibration, misalignment, leaks or frequent maintenance. A small steel support — the manifold bracket — is one of those quiet parts that does a lot of heavy lifting. Pick the right design, install it carefully and maintain it, and the whole system runs smoother for years. Ignore it, and you get headaches: noisy operation, more pipe stress, more callbacks.
Why the manifold support matters more than its size suggests
At first glance a bracket is just a bracket. In practice it controls how forces move through the piping network. Consider these simple outcomes when the support is wrong:
- Pipes vibrate and fasteners loosen.
- Joints and valve seats wear faster.
- Thermal expansion causes unexpected stresses.
- Access for inspection and repair becomes a problem.
All of those raise maintenance cost and risk. A smart support design spreads loads, controls motion and simplifies inspection. In short: good support turns variable loads into predictable behavior.
The practical parameters you must check before choosing a bracket
Don't treat the spec sheet like a shopping list. Apply it to the job:
- Actual load (kg / lb) — include manifold weight + water or refrigerant volume. If the manifold holds heavy valves or filters, add their mass.
- Dynamic load factors — pumps cause pressure spikes and vibration; motors and compressors add intermittent forces. Add a safety margin.
- Mounting substrate — will you bolt to concrete, steel frame, or a stud wall? Anchor choice changes allowable load.
- Environment — indoor dry room or rooftop exposed to weather? Corrosion risk changes material choice.
- Service access — will techs need to remove the manifold without dismantling a wall? Consider quick-release or modular attachments.
A rule of thumb I use on site: calculate static weight, then add 25–40% to cover dynamic effects unless you've measured vibration levels. If the site is seismic or highly industrial, go higher.
Material choices: what works where
Materials are not just about corrosion resistance. They influence stiffness, weldability and price.
- Carbon steel with coating — widely used indoors. Economical, strong, easy to weld. Needs finishing (paint, powdercoat) for moisture zones.
- Galvanized steel — good for mild outdoor exposure. Zinc layer helps but can wear if scratched.
- Stainless steel — for humid, salty or chemical environments. More expensive but reduces replacement cycles and maintenance.
- Aluminum — lightweight; used in some lightweight frames but less common for heavy manifolds because it's softer and less stiff.
Pick stainless where access for repair is difficult or the bracket will see salt spray or corrosive condensate. For screens and plant rooms we usually use painted carbon steel unless specified otherwise.
Design features that actually make installation faster and more reliable
Not all brackets are equally easy to work with. Look for these practical design features:
- Adjustable slots (not just fixed holes). Slotted holes allow small alignment changes in the field.
- Reinforced mounting plate where loads concentrate — prevents deformation under heavy weight.
- Removable clamps or split saddles so you can mount piping without turning the manifold assembly upside down.
- Integrated vibration isolators (rubber pads, neoprene) if vibration is a concern — reduces transmission to structure.
- Service clearance built in — leave space for valve actuators, filters and gauges.
If a bracket forces you to do awkward welds or block access to a flanged joint, it's the wrong bracket — even if the steel is thicker.
Fasteners and anchoring — options that survive real life
Fastener choice depends on substrate and load. Don't default to the same bolt for everything.
- Concrete anchors — use expansion anchors for static loads, chemical anchors for higher loads or vibration.
- Through-bolting into steel beams is robust — pair with washers and locknuts.
- Threaded inserts in precast panels can work but check pull-out ratings.
- Sleeved anchors degrade in cycles — prefer mechanical anchors rated for dynamic loading.
Torque settings matter. A common field failure is a "hand-tight" bolt that later loosens. Specify torque values and document them during commissioning.
Spacing and support points — the installation geometry that controls bending
How far apart should you put supports? It depends on pipe stiffness and load.
- Shorter spans mean less deflection but more anchors.
- Longer spans save anchors but increase bending and vibration.
General approach:
- Near elbows, valves, or branching points, place supports closer — these locations see higher local moments.
Avoid one-point suspension of a long manifold; use two or three supports to distribute loads and avoid a cantilever effect.
Thermal expansion: allow for motion without stress
Piping expands and contracts with temperature. Brackets must either permit movement or deliberately restrain it with anchor points and expansion loops.
Two practical methods:
- Sliding supports — support the pipe but allow axial movement. Use sleeves or low-friction pads.
- Guided supports — permit movement in one direction while restricting others.
Never clamp a heated run rigidly every few meters. That creates stress concentrations at the anchors or at the next fixed point (and leaks follow).
Vibration control: small measures, big impact
Vibration transmits forces to the building and to adjacent equipment. Simple fixes reduce wear:
- Add rubber pads or neoprene washers under bracket plates.
- Use spring isolators for heavy, vibrating manifolds.
- Install flexible connectors (hose loops) on pump connections to isolate pump vibration from the manifold.
Don't over-isolate: you still need positive location in at least two axes; isolates should be designed, not guessed.
Surface protection and finish: practical choices
Surface finishes matter less for internal dry rooms and more for service life in wet or outdoor locations.
- Powder coating gives a durable finish for indoor use and looks good.
- Hot-dip galvanizing provides thicker corrosion resistance for exterior mounting.
- Epoxy coatings resist chemical exposure and are used in many industrial facilities.
If painting on site, specify surface prep (blast or brush) and primer type to avoid premature flaking. Coating is only as good as surface preparation.
Installation mistakes I see on site (and how to avoid them)
Here are the common errors and straightforward fixes:
- Mistake: Bracket holes don't align, so pipe is forced into position.
- Fix: Use slotted brackets or shims; re-check layout before drilling.
- Mistake: Anchors selected for static loads only; vibration loosens them.
- Fix: Choose anchors rated for dynamic loading and add lock washers.
- Mistake: Zero allowance for thermal movement.
- Fix: Review thermal expansion calculations and add sliding supports.
- Mistake: Brackets block access to valves and gauges.
- Fix: Mock up assemblies or use CAD to verify service access.
- Mistake: Using a thinner plate to "save cost" — it bows under load.
- Fix: Use reinforced plates or ribs where loads are concentrated.
A practical tip: before cutting or drilling any structure, mock up the manifold with straps or temporary supports to confirm clearances.
Commissioning checklist that actually gets used
A one-page commissioning checklist prevents the "we tightened it so it's done" problem. Include:
- Confirmed load calculation with installed components.
- Anchor torque verified and documented.
- Level and alignment checked within tolerance.
- Movement allowance verified for thermal expansion.
- Vibration isolation installed where specified.
- Coating integrity inspection.
- Service clearance verified.
- Signed acceptance by installer and mechanical engineer.
Make the installer sign the checklist and keep it with the project records.
Inspection and maintenance: schedules that matter
Routine inspection avoids surprises. Simple cadence:
- Weekly: visual check for loose bolts or visible corrosion.
- Quarterly: torque test critical fasteners, check rubber isolators for hardening or cracking.
- Annually: remove and inspect coating, repaint or recoat as required, check welds and plate deformation.
When vibration monitoring is present, set alarm thresholds for sustained increases that suggest loosening or fatigue.
How to know when replacement is necessary
Replace a bracket when you see:
- Structural bending or permanent deformation.
- Coating failure with rust deeper than surface scale.
- Crack formation near welds.
- Repeated fastener failure after proper torqueing (indicates fatigue).
If replacement is likely, plan it with minimal system interruption: drain and isolate only the affected run, prepare a prefabricated replacement mounting assembly, and schedule work during low usage windows.
Costing decisions: initial spend vs lifecycle cost
People often choose the cheapest bracket on price alone. Instead, do a simple lifecycle cost comparison:
- Purchase price.
- Expected maintenance frequency and cost.
- Expected replacement interval.
- Downtime cost per hour (lost production, labor).
- Energy or efficiency impact (minor but real if vibration causes efficiency loss).
In many projects, a slightly higher upfront cost for better material and design pays back in fewer service calls and less downtime. Run a quick payback for your project assumptions.
Customization and modular options
Many manufacturers now offer modular bracket systems:
- Pre-cut slots for common pipe sizes.
- Pre-drilled plates to match common anchor patterns.
- Quick-release clamps for fast maintenance.
If you design multiple buildings or repeat projects, standardize on one modular system. It simplifies spares and speeds field work.
Case study, simplified and practical
A medium-sized office tower replaced older manifold supports during an HVAC upgrade. The original supports were thin plates bolted to block walls; over time they had bowed and corroded. The upgrade involved:
- Replacing with welded reinforced plates mounted to a steel sub-frame.
- Adding sliding pads to accommodate thermal expansion.
- Installing neoprene pads at contact points to reduce vibration.
- Recoating all exposed surfaces with epoxy finish.
Outcome: after six months there were no leaks, minimal noise complaints and planned HVAC checks were easier because valves were accessible.
Procurement checklist for buyers
When ordering, include these in the purchase specification:
- Exact pipe diameters and manifold dimensions.
- Load assumptions and dynamic factors used.
- Anchor type and substrate details.
- Required finish type and coating spec (including surface prep).
- Required adjustability (slots, removable clamps).
- Welding or fabrication tolerances.
- Delivery and lead time expectations.
- Warranty terms and test certificates (material and coating).
Don't buy off a photo alone. Ask for drawings and a fabrication plan.
Practical field tips for installers
- Always dry-fit before drilling anchors.
- Use a torque wrench and record readings.
- If the bracket is to be welded in place, ensure welders use certified procedures and that heat doesn't affect nearby components.
- When bolting to thin metal, distribute load with backing plates.
- Label each support position during assembly so post-install checks match the installation drawings.
Traps to avoid when retrofitting old systems
- Reusing old anchor holes without verifying integrity.
- Assuming old pipe runs had correct thermal allowance — they may not.
- Neglecting to coordinate with other trades (electrical raceways often pierce the same walls).
- Overlooking the need to isolate vibration sources (pump mounts etc.) when upgrading supports.
A measured, staged retrofit avoids surprises.
Small innovations that pay off
- Integrated leveling studs let you adjust the bracket on site to exact elevation without shims.
- Removable guard plates let technicians access valves without removing the main support.
- Wear indication slots machined into plates reveal when material loss reaches service threshold.
These practical features are cheap to add in design but save real labor later.
Checklist before you sign off
- Load calc reviewed and signed by engineer.
- Bracket design has slots/adjustability where needed.
- Fasteners and anchors specified for dynamic loads.
- Thermal movement plan agreed.
- Coating and material match environmental exposure.
- Commissioning and inspection checklist included in handover.
If all those boxes are ticked, the manifold will stay where you put it — and your maintenance team will thank you.
Manifolds and supporting brackets are not glamorous, but they matter. The right bracket design reduces maintenance, keeps valves reachable, reduces vibration problems and saves money over the life of the system. Spend a little time on load calculations, choose suitable materials, specify adjustability and service clearance, and set a realistic maintenance cadence. Those straightforward steps make a big difference in reliability.
-
OEM Decoupling Tank: What to Ask Your Chinese Supplier
Mar 04, 2026
Meta Description: Planning to source OEM decoupling tanks from China? Here are the key questions to ask your supplier before placing an order.
Keywords: OEM decoupling tank, China supplier, custom decoupling tank, hydraulic separator OEM
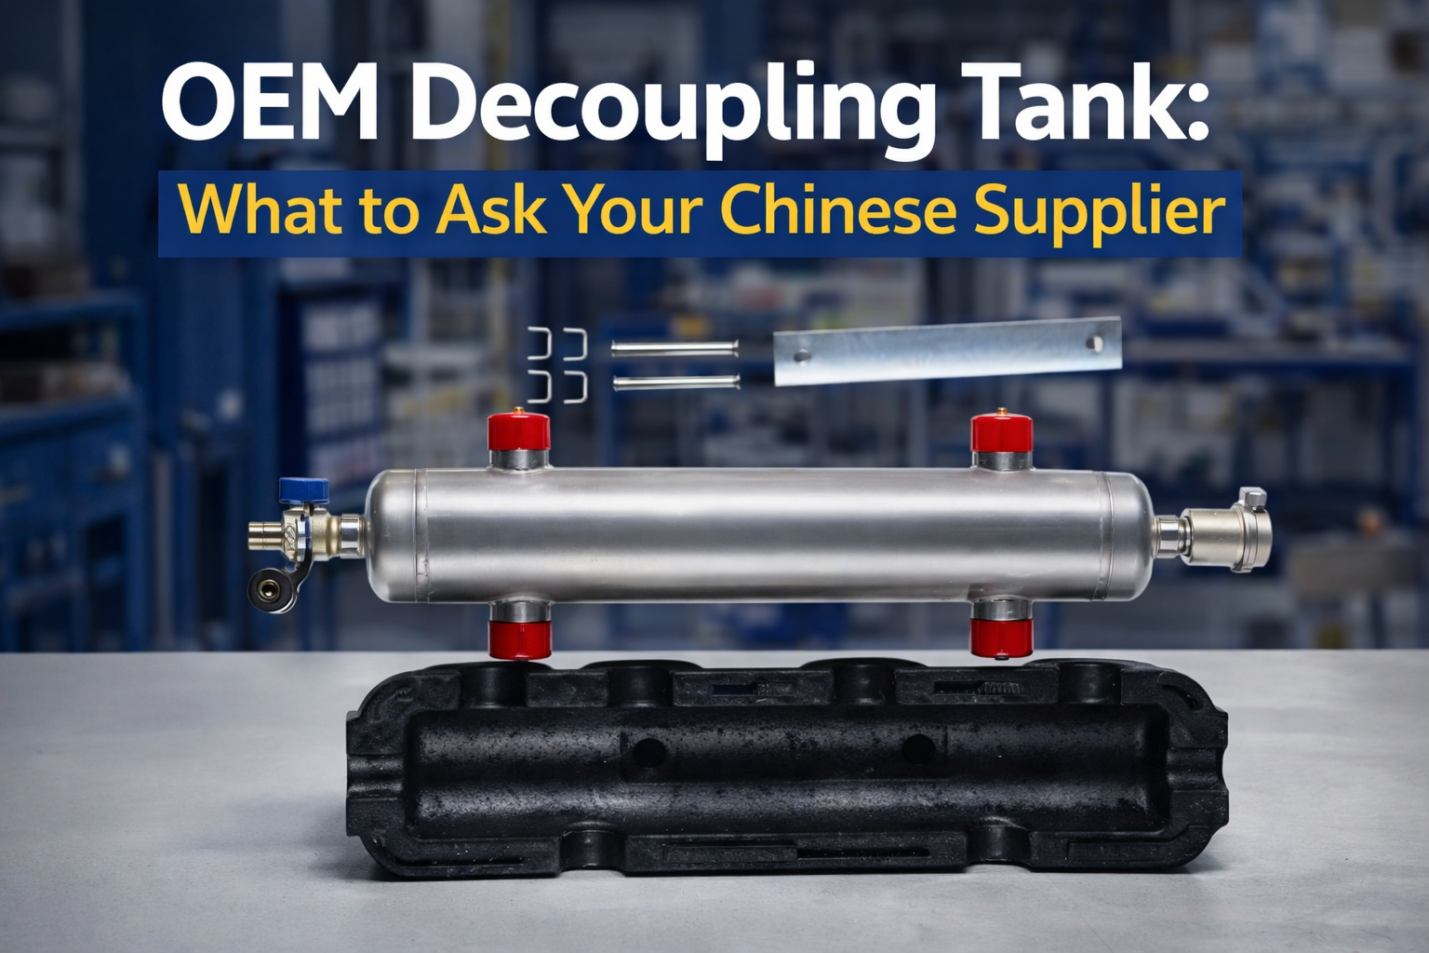
Sourcing an OEM decoupling tank from China can offer significant cost advantages — but only if you ask the right questions before committing. Whether you need custom dimensions, specific materials, or private-label branding, understanding what your Chinese supplier can deliver is essential to avoiding costly mistakes.
-
What Materials and Certifications Do You Offer?
Ask whether the supplier works with stainless steel, carbon steel, or brass, and confirm which materials suit your application — heating, cooling, or industrial fluid systems. Request documentation such as CE, ISO, or material test reports to ensure compliance with your target market standards.
-
Can You Customize Dimensions and Connections?
Standard decoupling tanks may not fit your system design. A reliable OEM partner should be able to adjust tank volume, connection sizes (BSP, NPT, or flanged), and port configurations based on your technical drawings or specifications.
-
What Is the MOQ and Sample Lead Time?
For OEM orders, understanding minimum order quantities and sample timelines is critical. Most Chinese manufacturers offer pre-production samples within 7–15 business days. Confirm this before signing any agreement.
-
How Is Quality Controlled?
Ask about in-house pressure testing, weld inspection processes, and third-party audit availability. Reputable suppliers will welcome quality checks and provide inspection reports with each shipment.
-
Can You Apply Our Branding or Packaging?
OEM typically includes private-label services. Confirm whether the supplier handles custom logo printing, packaging design, and labeling in-house or outsources it — this affects both lead time and quality consistency.
At JINYI, we support full OEM customization for decoupling tanks, from design to delivery. Contact us to discuss your project requirements.
Visit our official website: www.yh-jinyi.com
Contact us to discuss samples, drawings, or OEM cooperation
-
-
Which Manifold Bracket Improves Stability and Installation Efficiency
Mar 02, 2026
What You Need to Know About Manifold Bracket Applications in Industry
Manifold Bracket sits quietly behind the scenes in almost every serious piping system. You probably don't notice it — until something goes wrong. Then suddenly everyone's looking at the supports and asking why a relatively small piece caused a big headache. That's why, when professionals choose components, they don't just look at price or appearance. They want parts that behave predictably day after day, in messy, hot, vibrating industrial environments.
What factors affect the durability of a manifold bracket in industrial systems
Let's be blunt: a bracket's lifespan is decided more by the environment than by marketing claims. Put the same piece in a dry warehouse and in a salt-spray coastal plant, and you'll get very different results. So start by asking three simple questions about the site:
- What's the atmosphere like? If you're dealing with salt air, acidic fumes, or aggressive process fluids, corrosion is the main enemy. In those situations, plain carbon steel will start to look tired fast; stainless or coated steels are worth the extra upfront cost.
- How hot does it get — and how often? Thermal cycling (heating then cooling repeatedly) is stealthy: it works metal back and forth and eventually causes fatigue. Brackets near heat exchangers or steam lines need to allow for expansion.
- How much vibration or shock is present? Pumps, compressors, and nearby machinery punch the pipework repeatedly. That means you should consider both the clamp design and any vibration-damping options — rubber inserts, spring clamps, or tuned supports.
A few manufacturing details matter too. Welding quality, hole positioning, and the thickness of the load-bearing plates all change how the part behaves under load. I've seen brackets from different suppliers that look identical on paper but behave differently on the job — because one maker used a slightly thinner plate and cheaper weld fillets. The lesson: ask for drawings, check weld samples if you can, and when possible request supplier inspection photos or short test reports.
Finally, don't underestimate maintenance. Even the "right" bracket will fail early if it's ignored. Simple things — loose bolts, paint chips, or minor corrosion creeping in — are the usual culprits. A scheduled inspection, even a quick visual check once a quarter, will extend service life far more than swapping to a more expensive metal.
How can proper installation improve the performance of a manifold bracket
Installation is where theory becomes reality. A correctly chosen bracket can be rendered useless by a poor install. Here are the practical steps that save time and avoid rework.
Check alignment before you tighten anything. Sounds obvious, but it's a repeat offender. If you torque down bolts with a misaligned pipe, you introduce bending stress. Next heating cycle, and the pipe may shift or the welds crack. Use a straightedge or laser level where possible — it takes five minutes and prevents a week of headaches later.
Mind the torque. Many crews either under-tighten or over-tighten (cracking brackets or crushing gaskets). Follow the torque specs for the fasteners and remember: fastener grade matters. Use proper torque wrenches, and mark the bolts afterward so you can see if anything has worked loose in service.
Plan for thermal expansion. If your piping sees temperature swings, do not clamp everything rigidly. Leave expansion loops or provide sliding supports at calculated intervals. In steam lines, for example, a fixed support every few meters with sliding supports in between is a standard layout for a reason.
Use the right accessories. In high-vibration zones add damping pads; where corrosion is an issue, use isolation sleeves or sacrificial coatings. These small add-ons rarely cost much but reduce stress on the main support dramatically.
Check the substrate. Don't forget the structure you're attaching to — walls and frames need to be capable of taking the load. Too often, brackets are blamed when the real issue is a weak anchor point. Use chemical anchors or through-bolts where needed, and confirm the base material is in good condition.
One quick field note from experience: during a plant shutdown, I once watched a crew re-install a bracket and tighten bolts in a quick, sequential pass without re-checking alignment. The result: a pipe stressed so badly that a flange gasket failed two weeks later under normal load. The fix cost hours and a production hit. The moral — slow down at the install stage and save the plant time later.
Which materials are recommended for manifold brackets in harsh environments
Material choice isn't glamorous, but it's where most decisions either pay off or bite you later. Think of it this way: you wouldn't buy a winter coat for the tropics. The same logic applies when picking metals and finishes for supports that live in wet, hot, or chemical-splashed spaces.
Here are the materials you'll see most often — and when each makes sense:
- Carbon steel with protective coating: When you need strength at a lower cost, carbon steel with galvanizing or epoxy powder coating is a practical compromise. It's strong and economical, but don't treat the coating as invincible — scratches and welds can expose bare metal, so plan maintenance checks.
- Aluminum alloys: Lightweight and corrosion resistant, aluminum fits where weight matters — mobile skids, temporary rigs, or lightweight ductwork. But remember: aluminum can gall or wear differently when clamped against steel pipe, so isolate contact points if dissimilar metals touch.
- Duplex steels or specialty alloys: For highly aggressive chemical environments or very high temperatures, you'll see duplex stainless or nickel alloys specified. They're pricier, but sometimes unavoidable for safety and longevity.
A few practical notes from fieldwork:
- Coatings matter — but substrate matters more. A thin protective coat won't save a cheap base metal. If the environment is genuinely aggressive, start with the right alloy and then add coatings as backup.
- Think about dissimilar metal contact. When you clamp stainless to copper or aluminum, galvanic corrosion can appear. Use insulating sleeves or nylon washers where metals differ.
- Ask for test certificates. If you're buying brackets for a critical system, it's fair to request mill or material certificates. Good suppliers will share them — and you'll spot mis-matches early.
- Cost vs lifecycle math. A more expensive alloy can save maintenance cycles, downtime, and replacement costs. Run a quick payback check: if swapping to stainless reduces outages and rework, the upfront says yes pretty fast.
Quick material checklist (practical)
- Salt or coastal? Prefer 316 stainless.
- High temps? Check alloy max service temp.
- Heavy load? Use thicker carbon or duplex steel.
- Dissimilar metals nearby? Add isolators.
- Budget constrained? Carbon with coating + inspection plan.
Why regular inspection of manifold brackets prevents costly equipment issues
People often treat brackets like plumbing afterthoughts. That's a mistake. Small failures at supports are cheap to catch, but expensive to fix if they cascade into leaks, flange failures, or misaligned heat exchangers.
Here's a realistic inspection approach you can adopt today — it's the sort of routine our field teams use when they're trying to keep a plant running without surprises.
What to check, fast:
- Bolts and fasteners: Any loose or corroded bolts? Mark torque settings when installed and re-check after the first operational hours, then at regular intervals.
- Visible corrosion or paint loss: A small rust spot today can eat through a bracket next quarter. Address chips and recoat or replace as needed.
- Deformation or cracking: Heat cycles and vibration produce tiny cracks. When you find one, don't shrug — record it and assess if it's local or systemic.
- Insulation and isolation cuffs: Are rubber or nylon isolators intact? Compression here can signal over-torque or thermal growth issues.
- Alignment and sag: Pipes move slowly. Check for sagging between supports and verify expansion allowances are working.
Frequency
- High-stress areas: Monthly to quarterly (areas near pumps, compressors, expansion loops).
- Standard runs: Quarterly to biannually.
- Critical services (hazardous fluids): Monthly and after any abnormal event (pressure spike, shutdown).
An inspection story
At a waterworks plant we worked at, a maintenance tech noticed a fastener trending loose on a pump discharge bracket. Small thing — turned into a lead for a more serious truth: the pump's anchor bolts were shifting under thermal cycles. Because they caught the loose fastener early, the team reinforced anchors before a seal failed and caused an unplanned outage. Quick catch, big savings.
Tools & documentation
- Use torque wrenches and a simple straight edge.
- Keep a digital log (photos help). Note torque values, torque marks, and any remedial actions.
- Add inspection tasks into your CMMS with alerts based on operating hours, not calendar dates, when possible.
Regular inspections don't have to be labor-intensive. A short walk with a checklist prevents the small things from becoming process-stopping problems.
Tips for choosing a manifold bracket that fits your application needs
Buying a bracket isn't complicated — until the day you find it doesn't fit your field reality. To avoid that, treat the selection like a mini engineering exercise. Here's a practical roadmap.
Understand the load and environment
- Measure pipe diameter, weight per meter (or estimated when filled), and the maximum operating temperature.
- Note vibration sources, proximity to rotating equipment, and whether the pipe is insulated.
Pick the right family
- Standard clamps for routine runs. Economical and quick to source.
- Adjustable or slotted brackets when you need alignment tolerance on installation day. They save rework time.
- Spring or dynamic supports in lines with heavy vibration or thermal movement.
- Rubber-lined supports when you want to reduce metal-to-metal wear and dampen vibration.
Plan for thermal movement
Make sure your plan includes fixed points and sliding supports arranged so thermal expansion doesn't fight against your anchors. A good rule of thumb: select one fixed support every few meters in long runs, with sliding supports between — but adjust for your pipe material's expansion coefficient.
Maintenance and spare parts
- Order a few spare brackets per common size. It's surprisingly cost-effective.
- Get spares for isolators, fasteners, and pads too. They're the little parts that fail first.
Vendor checks
- Ask for dimensional drawings and check hole centers.
- Request a sample if it's a critical service. Install it and see how it fits.
- Verify the supplier can provide replacement parts and lead times.
Quick buyer's checklist
- Pipe specs documented? Yes / No
- Vibration present? Yes / No
- Thermal expansion considered? Yes / No
- Spares ordered? Yes / No
- Vendor drawings approved? Yes / No
If you can tick these boxes, you've likely saved yourself a rework or emergency order down the line.
Where should manifold brackets be placed for optimal system efficiency
Placement is more art than brute math. Poorly spaced supports will let pipes sag, develop stresses, and put extra load on flanges. Well-placed supports make the whole system feel solid — and they reduce noise, leaks, and maintenance.
Here's a practical guide to placement decisions.
Critical spots to support
- At changes in direction (elbows, tees) — these points transmit forces.
- Near equipment connections (pumps, valves, heat exchangers) — support close to flanges but leave space for alignment and maintenance.
- Across long unsupported spans — if you see sag, you underestimated spacing. Add supports.
- At transitions (insulated to bare pipe) — insulation changes how a clamp holds the pipe; design accordingly.
Don't overdo it
Too many supports create a different issue: they restrict expansion. You need a mix: some fixed supports to locate the run, and sliding supports to allow thermal growth. Think of supports as a choreography — some hold position, others let things move.
Practical placement workflow
- Start at fixed anchors (near pumps or structural constraints).
- Add sliding supports between anchors at intervals per the span table.
- Place intermediate supports at elbows, valves, or where the pipe changes direction or material.
- Revisit after a short test run — if the pipe moves oddly when hot or under pressure, adjust.
Field note
On retrofit jobs, I've seen teams place brackets where workers could easily reach with a wrench, not where the pipe needed support. The result: sagging and vibration. Don't shortcut placement for convenience — plan access, but prioritize structural need.
Practical takeaways and next steps
Brackets don't argue for attention. But they deserve it. Get the material, mounting, placement, and maintenance right and your piping system will stay quieter, leak less, and need fewer emergency fixes. Ignore them, and small problems become big ones, often at inconvenient times.
Here's a short action plan you can use on your next project or inspection round:
Survey your critical runs. Note environmental conditions and vibration sources.
Choose materials deliberately. Match alloy/coating to the environment — don't assume a one-size-fits-all metal.
Install with care. Check alignment, torque to spec, and allow for expansion.
Inspect regularly. Use a simple checklist and log findings. Early fixes cost less.
Buy spares. The few brackets you keep in inventory usually pay for themselves.
-
Why Does HVAC Mounting Clamp Selection Matter
Feb 27, 2026
A Practical, No-Fluff Guide to Choosing, Installing, and Caring for HVAC Support Hardware
Let's be blunt: a tiny piece of metal can make or break an HVAC job. We've all been on sites where big equipment works fine but a run of ducts sags, hoses shake, or a pipe joint leaks because the support was wrong. That's not glamorous, but it's where systems fail.
Why support hardware matters—short version
Think of supports as the skeleton for your piping and ductwork. If the skeleton's off, everything else gets stressed. Two quick consequences of bad support design:
- Mechanical stress — joints, flanges, and connections pay the price.
- Noise and vibration — which annoy occupants and loosen parts over time.
Fix those two and you avoid most callbacks. It's that simple.
A quick field story
On a mid-rise retrofit, the chilled-water main kept leaking at welds. Contractor blamed piping until we found eight poorly spaced straps — insulation water collected between pipe and metal, causing corrosion and fatigue. We added three more saddles, swapped to rubber-lined split clamps, re-routed an elbow by 200 mm, and the leaks stopped. The moral: small fixes, big payoff.
Common mistakes I still see (and exact fixes)
These are the repeat offenders. If you solve these, you're already above average.
Fasteners finger-tight or inconsistent torque
- Why it's bad: vibration backs out screws.
- Fix: torque wrenches on every critical fastener. Mark torque values on drawings. Use lock washers or Loctite where needed.
Clamps too close to fittings or moves
- Why it's bad: stiffer points near elbows cause stress.
- Fix: support straight runs, keep at least 150–300 mm from bends on small piping; distances grow with diameter.
One support carrying everything
- Why it's bad: multiple runs or branches concentrate load.
- Fix: distribute loads. Use trapeze hangers for groups, or add intermediate supports.
Material mismatch causing corrosion
- Why it's bad: galvanic corrosion between steel and stainless accelerates failure.
- Fix: match metals or isolate with sleeves, washers, or coatings.
Anchoring into non-structural materials
- Why it's bad: pull-through, deformation, or early failure.
- Fix: verify substrate, use backing plates, or tie into primary framing.
Ignoring thermal movement
- Why it's bad: rigid supports across long runs cause bending and stress.
- Fix: add sliding saddles, guides, or expansion loops at design intervals.
Skimping on isolation where vibration matters
- Why it's bad: chatter, noise, faster fatigue.
- Fix: rubber-lined clamps, spring hangers, or pipeto-flex connectors at equipment.
How to pick the right support — practical steps
Skip vendor catalogs until you answer these questions on the site.
What's the load per meter
- Quick calc: weigh a 1 m sample or use catalog weights. Add insulation and a 25% safety margin.
How much movement to expect
- Thermal growth on long runs? Choose sliding supports or allow an expansion loop every X meters (calculate from coefficient of thermal expansion).
What environment
- Indoor dry office vs. coastal plant vs. chemical exposure — pick materials accordingly.
Is vibration present
- Yes - add isolation. No - standard supports might do.
How often will you need access
- Frequent access - split clamps or quick-release designs.
When those are clear, select parts with ratings above your calculated loads. If in doubt, choose the next higher capacity model — the price difference is tiny compared with a service call.
Materials — what really works where
Short, honest rundown.
- Stainless steel (304/316): Go-to for coastal, chemical, or outdoor exposure. Lasts. Costs more. Worth it where replacement is hard.
- Galvanized steel: Cheap-ish and fine indoors. Not great in salt air.
- Aluminum: Light and non-rusting but not for heavy loads. Watch for galvanic contact with steel.
- Polymers/composites: Good for electrical isolation or chemical compatibility, but check temperature and load limits.
- Rubber-lined or neoprene pads: Essential for vibration dampening and to protect insulation.
A practical tip: if you're replacing failed galvanized parts in a coastal plant, upgrade to 316 stainless in the wet zones and keep galvanized on dry interior runs. That hybrid approach controls cost but fixes the weak points.
Installation tips that save time and reduce rework
Some of these are obvious, some are not. They all work.
- Pre-mark support locations on the actual installed route — not on the as-built drawing only.
- Use calibrated torque tools and record torque values on your punch list.
- For split clamps, slide the lower half under the pipe and align before tightening the top half — it saves awkward lifts.
- Always use anti-seize on stainless fasteners in high-temp zones.
- Temporary braces for overhead work: use them until the final fasteners are torqued. Don't rely on hand-tight positioning.
- If the clamp design includes a rubber liner, make sure the liner sits fully; partial liners trap water and grit.
One crew I worked with used colored paint marks on bolts after torquing — a quick visual check for inspectors that the fastener was set to spec.
Maintenance and inspection — what to actually do
A little routine goes a long way.
Frequency guide
- Harsh environments (coastal, chemical): inspect every 3–6 months.
- Normal commercial interiors: yearly.
- After events (earthquake, major overhaul): immediately.
Quick inspection checklist
- Fasteners: any backed-out or missing
- Corrosion: pitting, flaking, or deep rust
- Liners: cracked, flattened, or displaced
Movement: signs of unexpected pipe drift or new noise under operation?
If you find evidence of movement, add a temporary support and schedule a permanent fix. Don't wait.
Troubleshooting — fast fixes on site
Short problems, short solutions.
- Sagging between supports - add an intermediate saddle and verify insulation/wet weight.
- Vibration transmitted to structure - retrofit rubber-lined clamps or spring hangers; check flexible connectors.
- Corrosion at contact points - isolate dissimilar metals; consider replacing with same-alloy parts.
- Repeatedly loose fasteners - investigate thermal cycling or use locknuts/threadlocker.
If a pattern of failures shows up on multiple supports, step back and evaluate the whole route — often it's a spacing or material choice issue, not a single bad clamp.
Two short case studies from the floor
These aren't marketing blurbs — they're real and repeatable.
Retrofit office building
- Problem: sagging chilled-water with corrosion near supports.
- Fix: replaced thin metal saddles with rubber-lined split clamps and increased spacing density.
- Outcome: no sagging or leaks after 24 months.
Small coastal hotel
- Problem: brackets in mechanical room corroded within a year.
- Fix: swapped exterior-exposed brackets to 316 stainless and applied sacrificial anodes on nearby conduits.
- Outcome: bracket replacement interval extended from 12 months to 5+ years.
Quick procurement checklist (what to order)
When buying, have this ready:
- Exact pipe/duct diameter and insulation thickness.
- Total calculated load per support (include insulation and liquid).
- Environment classification (indoor dry / outdoor coastal / chemical exposure).
- Access requirement (split clamp? quick-release?).
- Any code / seismic / fire-rating requirements.
Give that to your supplier and ask for part codes for alternatives: standard, lined, split, seismic-rated.
If you search suppliers, using HVAC Mounting Clamp as the part keyword gets clean matches; don't forget to cross-check for lined or split versions.
Checklist for the crew — what to do before sign-off
- Verify all specified clamps installed and torqued to spec.
- Check alignment and measure any deflection under static load.
- Re-torque after 30–90 days of operation.
- Document with photos and a brief log: part codes, torque values, and installation notes.
- Add supports where insulation or condensate could accumulate.
A one-page install log with photos saves hours when something goes wrong later.
Straight from the field
Support hardware is boring until it's not. The jobs that run quietly for years are the ones where someone paid attention to these details. If you want a single rule: design like you'll be back for maintenance. Pick durable parts where replacement is hard, use lined supports where noise or condensation is possible, and always plan for thermal movement.
And remember: a well-chosen and properly installed support is cheap insurance against call-backs. It's not glamorous. It pays.
-
The Hardware Behind Every Reliable HVAC System
Feb 25, 2026
When people talk about HVAC systems, the focus is usually on boilers, heat pumps, air handlers, or smart controls. Yet in every successful installation, there is a quieter but equally important element working in the background — installation hardware.
From pipe clamps hidden behind walls to brackets supporting radiators and manifolds, these components play a critical role in system stability, safety, and long-term performance.
Why Installation Hardware Matters More Than You Think
A well-designed HVAC system is only as reliable as the parts holding it together. Poor-quality brackets or improperly designed supports can lead to vibration, noise, misalignment, and even system failure over time.
That is why installers, engineers, and HVAC manufacturers increasingly pay attention to:
- Structural strength and load capacity
- Corrosion resistance in different environments
- Installation efficiency on-site
- Long-term durability and maintenance costs
Supporting HVAC Systems, One Component at a Time
Yuhuan JINYI Hardware Co., Ltd. is a manufacturing company focused on metal installation hardware for HVAC and plumbing systems. We work closely with customers in Europe and North America to produce components that support both standard installations and customized system designs.
Our product range covers:
- Pipe clamps and fixing brackets
- Radiator brackets and supports
- HVAC mounting brackets for ducts and piping
- Manifold brackets and stainless steel manifolds
- Valve components and custom metal parts
Each product is manufactured with attention to fit, strength, and consistency, helping installers work more efficiently and systems perform more reliably.
Built for Real-World HVAC Environments
HVAC installations operate under constant temperature changes, pressure, and mechanical stress. To meet these challenges, JINYI uses materials such as carbon steel and stainless steel, combined with surface treatments like zinc plating and powder coating, to extend product lifespan and improve resistance to corrosion.
Our manufacturing process focuses on:
- Stable quality across batches
- Precise dimensions for easy installation
- Compatibility with common HVAC system designs
- A Manufacturing Partner, Not Just a Supplier
Many of our customers are HVAC brands, system integrators, and distributors looking for a long-term manufacturing partner. As a direct factory, JINYI supports:
- OEM and ODM projects
- Custom designs based on drawings or samples
- Flexible production volumes
- Consistent lead times and export experience
We understand that behind every order is a system that must perform reliably in real buildings, for real users.
Quietly Supporting Better HVAC Systems
Installation hardware may not be the most visible part of an HVAC system, but it is one of the most important. At JINYI, we focus on producing components that do their job quietly and reliably, so HVAC systems can perform as designed — today and for years to come.
To learn more about our HVAC and plumbing hardware solutions, visit: https://www.yh-jinyi.com/
-
Which China Shower Head Reduces Maintenance Costs
Feb 23, 2026
How to Choose and Use a China Shower Head That Cuts Operating and Maintenance Costs
A well-chosen shower fitting combines user comfort with predictable service performance. With many projects relying on fixtures sourced from overseas suppliers, procurement teams and installers need clear guidance that balances aesthetics, water economy, and long-term reliability. This guide helps building owners, designers, and contractors evaluate models made in China, test samples in local systems, and set purchasing and installation processes that reduce maintenance calls and keep bathrooms functioning smoothly over years of use.
The phrase China Shower Head appears deliberately in this guide because many buyers will encounter that label in catalogs and trade listings. The steps below explain how to treat such listings pragmatically: verify materials and finish, confirm flow characteristics in situ, and plan for spare parts and straightforward servicing.
Why the choice matters: small parts, large consequences
On a single-family scale, a faulty fitting is an annoyance. On a hotel or multi-unit residential site, it becomes a recurring expense. A wrong material choice, a finish that reacts poorly to local cleaning agents, or a spray pattern unsuited to low pressure systems can require replacements, frequent descale operations, or guest complaints. Avoiding those outcomes starts before orders are placed — with focused sample testing and supplier verification.
Key areas where a poor choice shows up quickly:
- Seal and hose wear from incompatible elastomers or aggressive water chemistry.
- Finish degradation on exposed surfaces when the coating method is not robust enough for coastal or industrial areas.
- Perceived weak flow in low-pressure systems, causing retrofit changes that add labor and parts.
- Part interchangeability problems when non-standard fittings require special adaptors.
Thinking in terms of lifecycle cost rather than unit price helps teams avoid reactive spending later.
Product families and their practical trade-offs
Shower fittings come in a few core families. Understanding these families helps narrow selections quickly and select a model that suits the real-world conditions of the project.
- Fixed overhead (rain) heads: Provide a broad, immersive coverage. They tend to work best with higher supply capacity and can require larger ceiling mounts.
- Wall-mounted fixed heads: Compact and simpler to install; they usually pair well with conventional shower valves in apartments.
- Handheld assemblies: Offer flexibility for cleaning and assisted bathing; hoses and brackets become additional maintenance items to monitor.
- Multi-function models: Allow switching spray modes; useful for varied preferences but introduce moving parts that require occasional servicing.
- Eco or low-flow designs: Aim to cut consumption while maintaining a pleasant spray; effectiveness varies by nozzle design and local water pressure.
When specifying, match family to use case: a hospitality suite may prioritize guest experience and choose a multi-function set, whereas a public facility could favor low-flow, easily maintained heads.
Materials and finishes: match choices to exposure and use
Material choice underlies durability. Avoid generic descriptors and require concrete information from suppliers.
Metals and alloys
- Stainless alloys are common for internal components and exterior bodies where corrosion resistance matters.
- Brass is frequently used for valve components because it machines well and resists many common forms of corrosion.
- Zinc and plated steels may appear in budget lines; careful attention to coating method is necessary to ensure reasonable life in humid or salty environments.
Surface treatments
Finishes vary from polished chrome plating to brushed treatments and powder coatings. The durability of a finish depends on the base material and the process used. Hot-dip or well-controlled electroplating processes, followed by passivation where required, will perform differently in the field. Ask suppliers to describe their finishing process rather than rely on visual samples alone.
Elastomers and hoses
Seals, O-rings, and flexible hoses should be specified by elastomer family when possible. EPDM, silicone, and certain nitrile compounds have different resistances to temperatures, chlorine, and cleaning agents. A simple statement of compound family and operating temperature range provides far more clarity than generic "rubber" labels.
A short procurement tip: require the supplier to list all key material families and the process used for finishes. This reduces ambiguity and helps maintenance teams plan replacements.
Water performance: flow, feel, and site reality
Flow rate and the user's perception of water pressure differ. Two devices with the same liters-per-minute figure can feel different because of nozzle geometry and whether air is entrained into the stream.
Considerations for performance
- Local pressure profile: Fixtures that feel generous in high pressure may feel weak in systems with low static head. Match design to measured supply pressure.
- Nozzle design: Aerated or multi-jet nozzles can deliver fuller sensation at lower flow. Ask suppliers for qualitative descriptions of nozzle behavior, and test sample units under local pressures.
- Balance of conservation and comfort: For projects with water restrictions, low-flow heads with proper nozzle design can satisfy both targets but must be verified on-site.
A practical approach is to test samples in the actual plumbing during the pilot stage rather than relying on lab data alone. The subjective experience matters to users and drives complaint volumes.
Type Best for Service points Typical maintenance Fixed overhead head Luxury feel in suites Mounting, seals Occasional descaling, verify mount tightness Wall-mounted head General residential use Seal and valve Routine cleaning, seal check Handheld assembly Assisted use and cleaning Hose, bracket, seals Hose inspection, replace seals as needed Multi-function head Variety of user preferences Selector mechanism, seals Check selector for smooth action, replace seals periodically Low-flow head Water-limited environments Nozzle blockage Regular descaling, check flow pattern Sample testing: a non-negotiable step
A pilot sample tested in real conditions reveals far more than photos or showroom demonstrations. Include these checks in on-site trials:
- Fit and threads: Confirm compatible thread types and that adaptors are not needed.
- Operational testing at low and high pressure: Run hot and cold cycles and test shower response.
- Spray uniformity and feel: Validate that nozzle design provides acceptable coverage and sensation.
- Seal behavior under temperature: Cycle hot water through the fitting to ensure seals remain pliant and leak-free.
- Nozzle cleaning access: Confirm that jets are serviceable without removing the whole head.
Sample evaluation prevents large-scale rollouts of a product that does not match local conditions.
Installation practices that reduce early service calls
Quality installation matters as much as product choice. Consider these practical recommendations:
- Pre-verify thread types and water connections. Pre-check material compatibility and thread sizes.
- Avoid over-tightening. Use recommended sealing materials and torque settings to prevent stress damage.
- Provide clear commissioning steps. A brief checklist helps contractors avoid missed items and clarifies acceptance responsibilities.
- Ensure good mounting support. Solid support prevents movement that accelerates wear on seals and connectors.
- Conduct a water quality check. High mineral content or chemical additives can change maintenance cycles; note this on handover docs.
Training installers on the manufacturer's basic recommendations reduces avoidable call-outs in the first months after handover.
Cleaning and routine care guidance
Simple, light maintenance extends service life significantly:
- Use soft cloths and mild detergents. Abrasive cleaners and pads damage finishes and accelerate wear.
- Schedule periodic nozzle cleaning. Soak removable nozzle plates in mild vinegar solution where calcium deposits accumulate.
- Inspect hoses and seals annually. Proactive replacement before failure lowers the risk of water damage.
- Avoid aggressive disinfectants on finishes. Some agents can dull or pit coatings; label compatible cleaning products where fixtures are in commercial use.
Providing a concise care card with each unit reduces missteps by end users or cleaning contractors.
Evaluating suppliers and protecting the project
Supplier selection is as important as product choice. Key checks that reduce later maintenance needs:
Documentation and traceability
Require material descriptions and batch traceability for key metal and elastomer components. Production batch records simplify root cause analysis if a defect appears.
Finishing and testing records
Ask for evidence of finishing control — bath chemistry, coating thickness checks, or salt-spray logs where corrosion resistance matters. Quality records show the producer's discipline.
Spare parts and support
Confirm that common wearable items — hoses, O-rings, cartridge inserts — are available for several years. Delivery speed for spares is often as important as unit price for operational continuity.
Pilot and warranty terms
Negotiate a pilot order and ensure warranty language addresses premature failures. Include practical remedies and turnaround times.
A procurement checklist that covers these points prevents surprises and spreads accountability.
Logistics, packaging, and transit protection
Damage in transit creates avoidable service costs. Specify packaging terms:
- Internal separators or foam to prevent units from rubbing and scratching.
- Anti-corrosion paper or VCI for long ocean voyages.
- Batch labeling on cartons for rapid receiving and traceability.
- Handling instructions to prevent damage when unpacking on-site.
Agreeing these details in advance reduces the need for on-site rework and keeps replacement units in stock.
Sustainability and regulatory considerations
Many public and commercial projects now include sustainability criteria. Consider:
- Water performance certifications recognized in your region.
- Material sourcing transparency to meet procurement policies.
- End-of-life considerations such as recyclability of metals and hoses.
Selecting products that align with project sustainability goals helps with approvals and ongoing operational reporting.
Procurement strategies that smooth operations
Adopt a staged procurement approach:
- Sample and pilot: Validate performance in real conditions.
- Staged rollouts: Phase deliveries by building or floor to reduce risk.
- Safety stock: Maintain a small buffer of spare parts for critical venues.
- Dual sourcing: For large deployments, qualify an alternate supplier to mitigate production or shipping delays.
These measures smooth installation schedules and reduce emergency spending.
Common pitfalls and how to avoid them
Avoid these frequent mistakes:
- Buying on appearance alone. A polished finish can hide thin plating or incompatible base alloys.
- Neglecting local water chemistry. Hard or aggressive water shortens nozzle life and affects seals.
- Skipping sample validation. Large orders without pilot testing often reveal unforeseen issues in the field.
- Assuming universal hose and valve compatibility. Small variations can cause stress on connections and lead to leaks.
Clear technical specifications and sample testing close most of these gaps.
Measuring outcomes: what to track post-installation
Track a few simple metrics to judge if choices are reducing maintenance load:
- Number of service calls per installed 100 units over the first 12 months.
- Average time to repair or replace a failed part.
- Frequency of nozzle cleaning or descaling required.
- Rate of part interchange or adaptor usage during installations.
Trends in these measures indicate whether the pilot and specification approach are working.
Checklist for selecting and installing fixtures from China suppliers
- Obtain sample units and test them in local plumbing.
- Request clear material descriptions and finishing process summaries.
- Confirm availability of spare hoses, seals, and cartridges.
- Specify transit packaging and labeling requirements.
- Include pilot, staged rollouts, and small safety stock in procurement.
- Provide installers with a concise commissioning checklist and care card.
Applying these steps converts a procurement decision into an operationally stable outcome.
A thoughtful approach to selecting fixtures — whether the product is labeled China Shower Head or carries another origin descriptor — prevents repeated service visits and reduces lifecycle expense. Testing samples, verifying materials and finishes, and setting robust procurement and installation practices turn a fixture into a predictable element of building operations rather than a recurring problem source. With modest planning and a pilot-first mindset, teams deliver bathrooms that satisfy users and stay dependable for years.
-
What Makes a Clamps Manufacturer the Right Choice for You
Feb 20, 2026
How to Source a Reliable Clamps Manufacturer: A Practical Guide for Buyers and Engineers
Small components can cause big problems. Clamps are a case in point: they are inexpensive on a unit basis but they interact directly with piping, hoses, and structural supports. Wrong choices show up as leaks, damaged coatings, frequent replacements, or time-consuming on-site fixes. It focuses on what matters when you source clamps manufacturers: material and finish, manufacturing controls, inspection and testing, logistics and packaging, procurement tactics, and lifecycle cost thinking. A single comparison table helps you match clamp families to typical uses. Use the checklists and RFQ language provided to make supplier responses easier to compare.
Why clamps deserve engineering attention
It's easy to assume clamps are trivial. In practice, they are mechanical interfaces that must resist environmental attack, mechanical load, and installation variation. Three practical consequences of under-specified clamps:
- Installation rework when dimensions don't match pipe fittings or brackets.
- Early corrosion and replacement when the coating or material is inappropriate for the environment.
- Functional failures under vibration or thermal cycling when the clamp family lacks the required design features.
Addressing these risks early — before purchase orders are issued — reduces downtime and prevents cascading project delays.
Understanding clamp families and their typical applications
Clamp Type Typical Environments Typical Materials Primary Strength Common Limitations Worm-gear hose clamp Plumbing, low-pressure hoses, indoor systems Zinc-plated steel, 304 stainless Cost-effective, flexible fit Not ideal for high vibration or hot, high-chloride environments T-bolt clamp Heavy-duty hoses, turbo lines, industrial flexible connections 304/316 stainless, hardened steel High clamping force, resists loosening Larger profile and higher cost Ear (Oetiker) clamp Small diameter hoses, tamper-evident assemblies Stainless steel Compact, permanent fit Single-use; no adjustability Rubber-lined pipe clamp Coated pipes, vibration-prone installations Steel body + EPDM/NBR lining Protects coatings, reduces vibration and noise Elastomer temperature limits require attention Repair clamp Buried or exposed pipeline emergencies Cast iron, stainless + gasket Fast leak containment Often a temporary repair; check pressure rating Pipe support clamp Suspended piping, HVAC, process lines Hot-dip galvanized steel, stainless Structural support for loads and alignment Must be matched to load and thermal movement requirements Material and finish: not all "stainless" or "galvanized" are equal
The material under the surface defines long-term behavior. A generic “stainless” note in an RFQ allows suppliers to substitute grades that look similar but perform differently. Be specific.
What to require in specs
Demand mill/material certificates tied to heat numbers or batch IDs. Specify coating type and minimum coating thickness where relevant. For rubber linings, require compound name, shore hardness range, and maximum continuous service temperature. These details avoid confusion and make supplier offers comparable.
Manufacturing steps where variation commonly appears
Understanding the production flow helps you see where problems arise and what to check in a factory audit.
- Incoming material control — Reliable suppliers test strips and hardware on arrival. Ask for incoming inspection processes and sample documentation.
- Stamping and forming — Tooling precision controls hole spacing, band width, and repeatability. Tool life and maintenance schedules reduce dimensional drift.
- Welding and assembly — Qualified welds and correct heat treatments are critical on heavy-duty clamps and structural supports.
- Surface finishing — Plating, galvanizing, and passivation need proper chemistry and thickness control; require test logs.
- Assembly and testing — Adhesion checks for rubber lining, torque tests for fastening clamps, and packaging control help prevent transit damage.
When problems arise in the field, they often trace back to lapses at one of these production stages.
Quality control and testing: specify what you will accept
Testing must be contractual, not optional. Typical test and documentation items you should require:
- Material certificates (MTCs) referencing specific batch or heat numbers.
- Salt spray testing (ASTM B117 or comparable) for coated parts where corrosion resistance is important.
- Dimensional inspection reports for critical tolerances; CMM reports for tight-dimension parts.
- Torque retention testing for worm and T-bolt clamps, to verify the clamp holds under vibration cycles.
- Elastomer adhesion/peel testing for rubber-lined clamps, with minimum adhesion values.
- Pre-shipment inspection report with photos and sampling records; allow third-party inspection if needed.
Define sampling plans (for example, 5% samples with acceptance criteria), and clearly state who bears remediation costs for nonconforming shipments. Clear acceptance criteria avoid disputes and speed resolution.
Factory audits and remote verification
A factory visit provides direct information; if travel is not feasible, require live video or third-party audits. What to look for:
Onsite indicators of reliability
- Tooling room and spare die inventory — presence of maintenance logs and spare dies signals control of repeatability.
- IPQC checkpoints — in-process quality control stations with logged results show process discipline.
- Plating and finishing lines — control of bath chemistry, drying ovens, and thickness measurement devices.
- Welding station evidence — welding procedure specs and welder qualifications.
- Final inspection reports — evidence that the factory performs and records final checks before packing.
Remote audit approach
- Request a live video walk-through showing the production line and QA documentation with timestamps.
- Ask for recent pre-shipment photos and test results from lots similar to your expected order.
- Use independent inspection firms (e.g., SGS, Bureau Veritas, Intertek) for high-risk orders.
Procurement tactics that reduce risk
Several practical procurement measures help turn a supplier relationship into predictable supply:
Pilot and staged ordering
Start with samples, then a pilot batch, before committing to full-volume production. This allows fit and function testing on actual assemblies.
Multi-sourcing for critical parts
Qualify two suppliers for critical clamp families. Dual sourcing reduces the risk of a single factory disruption halting field work.
Clear contractual acceptance criteria
Spell out pre-shipment inspection, rejection remedies, lead times, and penalties for repeated late deliveries. Hold back a portion of payment until acceptance to incentivize compliance.
Maintain safety stock
Keep a small buffer of frequently used or critical clamps. This guards against shipping delays and production hiccups.
Lock in spares and packaging
Require spare hardware availability for an agreed number of years and firm packaging requirements to protect finish and geometry in transit.
Packaging, labeling and logistics: small items that save time
Transit damages and poor labeling cause unnecessary site work. Agree packaging and labeling requirements up front:
- Use separators between stacked clamps to prevent deformation and scratches.
- Include anti-corrosion papers or VCI packs for long sea voyages.
- Label cartons with part number, batch number, and quantities for fast receiving.
- Pack crates to prevent movement in container transit; specify internal bracing if necessary.
Also confirm HS codes and required export documents with your supplier so customs surprises are minimized.
Common failure modes and how to prevent them
Anticipating failure modes lets you specify features that avoid them:
- Corrosion and coating flake — specify proper material grade or thicker coating and require salt spray evidence.
- Loosening under vibration — choose T-bolt clamps, vibration-resistant fasteners, or include lock features; require torque retention testing.
- Rubber liner delamination — specify compound and adhesion testing; require proper curing and surface prep.
- Dimensional mismatch — require sample fit tests and clear tolerances; demand CMM reports for tight fits.
Failure mode prevention is largely about clarity in specs and confirmation through testing.
Lifecycle cost thinking: beyond the unit price
Unit price is one input; total cost over the life of installed clamps is what matters. Consider:
Total lifecycle cost = purchase price + transport + installation labor + expected replacements × replacement cost + downtime cost per failure
A higher-priced clamp that lasts longer and reduces downtime often has a lower lifecycle cost. Model scenarios for large installations and factor in replacement frequency and labor cost.
Why Choosing the Right Clamps Manufacturer Reduces Maintenance Costs
Small fittings are often overlooked during design and procurement. Yet hardware used to secure piping, hoses, and conduits has a disproportionate effect on service continuity. Selecting an appropriate manufacturer for these components can lower the total cost of ownership by reducing the frequency of repairs, simplifying servicing, and improving operational predictability.

How component sourcing affects long-term expense
At first glance a band or bracket is inexpensive. Over the life of an installation, however, repeated replacements and emergency fixes multiply that initial outlay many times. Several mechanisms explain why:
- Mismatch with operating conditions. Parts built from unsuitable materials or finishes wear faster in corrosive, high-temperature, or abrasive environments.
- Dimensional inconsistency. Poor manufacturing tolerances lead to installation rework and the use of non-standard fasteners or shims, increasing labor hours.
- Frequent loosening or failure. If a component does not hold in vibration-prone systems, it may require recurring tightening or replacement, leading to repeated site visits.
- Damage during transport and storage. Inadequate packing or poor handling instructions can arrive as scratched, bent, or contaminated items, which then need rework before installation.
A thoughtful supplier selection process addresses these sources of recurring cost before the first component is fitted on site.
What to assess in a supplier to limit upkeep demands
Choosing a producer is not just about price and lead time. The following supplier attributes translate most directly into fewer maintenance events:
1. Material sourcing and traceability
A producer with documented material provenance and batch records enables precise matching of component metallurgy to the installation environment. Traceability supports failure analysis and helps avoid repeated use of non-suitable batches.
2. Process control and tooling maintenance
Stable dimensions depend on well-maintained tooling and routine calibration. Factories that schedule die maintenance and log replacements tend to ship parts with consistent geometry, reducing on-site fitting adjustments.
3. Surface treatment discipline
How an item is finished matters more than its raw alloy in many real-world contexts. Consistent application of protective coatings, documented bath chemistry, and drying procedures reduce early corrosion, which otherwise leads to costly replacements.
4. Assembly and functional testing
When components are shipped after functional checks — such as torque retention for screw-type fastenings or adhesion tests for cushioned parts — installers face fewer surprises and system downtime falls.
5. Support and spare availability
A supplier that can supply spare parts quickly or has a clear plan for small-batch reorders helps operations avoid prolonged outages when a part does fail.
Design and specification choices that cut upkeep bills
Procurement teams and engineers can write specifications that make it easier for manufacturers to deliver durable parts and for maintainers to keep systems running smoothly.
- Specify material families rather than generic descriptors. Ask for specific grades and acceptable alternatives tied to the application environment.
- Require documented finishing processes. Stating the type of finish and a qualitative expectation reduces interpretation and ensures consistent protection.
- Define functional acceptance tests. Include simple, non-numeric checks such as the ability to hold a secure clamp under a simulated vibration cycle or a basic adhesion test for linings.
- Include labeling and batch IDs. When cartons and parts include batch identifiers, replacements and corrective actions are quicker and more accurate.
These measures help the supply chain deliver components that meet operational needs rather than cause ongoing maintenance work.
Field experience: common problem areas and supplier-linked remedies
Over many installations, certain failure patterns appear repeatedly. Below are frequent pain points and the supplier-side practices that reduce their incidence.
- Corrosion on exposed parts. Remedy: insist on appropriate material or finish and request recent, documented test evidence for the finish method.
- Fasteners seizing or stripping. Remedy: require compatible fastener grades and pre-shipment torque checks or lubrication where appropriate.
- Rubber lining deterioration. Remedy: specify elastomer family for the expected fluid and temperature exposure and require adhesion or cure records.
- Dimensional mismatches. Remedy: ask for sample fit tests and dimensional inspection reports ahead of large orders.
Having these checks in purchase agreements shifts the burden of performance onto production processes rather than on-site repairs.
Supplier Attribute How It Reduces Maintenance Needs Field Outcome Material traceability Ensures correct alloy use for environment Fewer corrosion-related replacements Tooling and process control Promotes dimensional repeatability Lower installation labor and rework Consistent finishing Extends surface life against exposure Reduced frequency of part change-outs Functional pre-tests Verifies performance before shipment Fewer emergency call-outs Spare parts planning Ensures quick replacements Shorter downtime windows Procurement practices that convert supplier quality into savings
Turning capable manufacturing into lower upkeep costs requires actions during purchasing and contract management:
Pilot testing and phased rollouts
Begin with a controlled sample run or short pilot installation. Verify performance under real conditions before scaling up. This prevents systemic issues across broad deployments.
Staged delivery and safety stock
Accept deliveries in stages aligned with installation phases while keeping a modest safety buffer of critical fasteners. This reduces pressure to accept a compromised batch in a hurry.
Warranty and remediation terms
Write clear clauses that require remediation, rework, or replacement when items fail before an agreed service life. While not a substitute for good quality, such clauses incentivize the supplier to meet expectations.
Third-party inspection where risk is high
Independent checks, whether in-process or pre-shipment, add assurance for high-value or mission-critical projects. They also provide documented evidence should warranty or corrective action be needed.
These tactics help avoid the repeated cost of emergency fixes and rework.
The role of communication and technical partnership
A supplier willing to engage technically — reviewing drawings, suggesting minor design adaptations for manufacturability, or advising on alternate finishes — often becomes a partner in reducing long-term expense. That partnership is pragmatic:
- Engineers gain access to production knowledge that avoids design choices known to cause wear.
- Buyers benefit from realistic lead-time and testing plans that align production with installation windows.
- Maintenance teams receive parts and documentation that simplify routine checks and repairs.
Open, detailed communication short-circuits many maintenance drivers by addressing root causes upstream.
Measuring success: metrics procurement teams can track
To see if supplier selection is lowering upkeep costs, monitor a few simple indicators:
- Rate of on-site replacements per 1,000 installed units.
- Average time-to-replace a failed item (minutes or hours).
- Incidence of emergency maintenance calls related to fastening or support hardware.
- Percentage of shipments accepted without rework after pre-shipment inspection.
A downward trend in these measures typically signals that supplier and specification choices are delivering the intended benefits.
Practical checklist: questions to ask before final supplier approval
- Can you provide batch-level material documentation and traceability?
- How do you control tooling wear and dimensional drift?
- What finishing methods do you use and how are they validated?
- Are functional checks performed for each batch and are records retained?
- Can you guarantee availability of spare parts for the expected project lifetime?
- Will you accept staged orders and support pilot testing?
Having affirmative answers — and supporting evidence — from a potential partner places the power to reduce future upkeep costs into the hands of procurement and engineering teams.
Reducing upkeep expense begins long before the first pipe is installed. It starts with supplier selection, clear technical specifications, and contractual terms that make quality measurable and verifiable. By prioritizing material traceability, process discipline, finishing consistency, and practical testing, teams convert a routine procurement decision into a strategic measure that lowers repair frequency, shortens downtime, and improves predictability for operations. The right partner makes maintenance planning simpler and less expensive; the right process makes failures rarer and easier to resolve.
Documentation and traceability: what to demand
Insist on documentation as part of delivery:
- Batch traceability and packing lists mapped to MTCs.
- Coating thickness and salt-spray logs for coated items.
- IPQC and FQC records for production hold points.
- Pre-shipment inspection report and photographs.
- Installation guidance including recommended torque settings and maintenance notes.
Digital certificates (PDFs with batch numbers) and QR-coded carton labels shorten approval and audit cycles.
Quick checklists you can use now
Pre-RFQ checklist
- Define environment, loads, and movement.
- Select clamp family and draft initial material and finish requirements.
- Plan pilot batch and acceptance criteria.
Factory audit quick checklist
- Tooling room and die maintenance records.
- IPQC logs and sample test results.
- Plating/galvanizing line evidence and bath records.
- Final inspection process and packing photos.
On-receipt inspection quick checklist
- Random measurement of critical dimensions vs drawing.
- Visual check of coating and plating thickness measurement.
- Torque check on sample clamps.
- Packaging and batch ID verification.
Use these short lists in RFQs and as a guide for inspectors.
Make clamps predictable parts of your supply chain
Clamps will never be glamorous, but they can be predictable. The difference between frequent site rework and smooth installations often comes down to clear specifications, early sample verification, and contractual test requirements. Require material traceability, insist on practical tests, stage your orders, and maintain a small safety stock. Those steps convert clamps from a potential source of delay into routine supply items.
-
Radiator Wall Brackets: A Key Component in Heating System Installation
Feb 18, 2026
Radiator wall brackets play a critical role in the stability and performance of modern heating systems. Although often considered a small accessory, the quality of a radiator bracket directly affects installation efficiency and long-term safety.
In most HVAC installations, radiator wall brackets must provide accurate positioning and sufficient strength. Poorly manufactured brackets may cause uneven mounting, vibration, or even wall damage over time. This is why many European contractors and system integrators prioritize high-quality mounting hardware.
Another important aspect is adjustability. Adjustable radiator brackets allow installers to compensate for wall irregularities and ensure proper radiator alignment. This reduces installation time and improves overall project efficiency.
JINYI, a Chinese manufacturer specializing in HVAC installation hardware, offers multiple models of radiator wall brackets designed for different radiator types and installation requirements. From fixed brackets to adjustable support solutions, JINYI provides stable quality, consistent dimensions, and reliable surface finishes.
With experience supplying European and North American markets, JINYI supports OEM and private label projects for radiator manufacturers, distributors, and HVAC brands. Reliable radiator wall brackets are not just accessories—they are essential components for professional heating system installations. Discover more about our products and global supply solutions at https://www.yh-jinyi.com
-
How Can China Clamps Meet Industrial Requirements
Feb 16, 2026
China Clamps: A Practical, No-Nonsense Guide for Buyers and Engineers
Sourcing china clamps from China is a routine part of industrial supply chains today. Yet for many teams, what looks like a simple purchase often turns into a week of back-and-forth, a surprise batch failure, or worse — a site delay. That's avoidable. This guide walks you through what matters: real-world buying checks, material choices that actually work, manufacturing traps to watch for, and procurement methods that reduce risk.
If you're short on time: focus on three things — specify material and coating clearly, insist on sample tests, and split big orders into staged deliveries. Now let's dig into the detail.
Why China? Why clamp sourcing here is attractive
There's a reason China dominates clamp production. Large-scale stamping, mature supply chains for fasteners and steel strips, and a vast network of smaller factories able to make custom parts quickly — it's all there. For buyers who need volume, price control, or a custom geometry, China is a natural source.
But scale brings variety. Some factories are meticulous; others cut corners. The difference shows up as either a reliable part that fits first time, or a crate of clamps that need rework. If you treat clamps like low-value commodities, you'll pay for it later. Treat them like engineered components and you'll avoid most headaches.
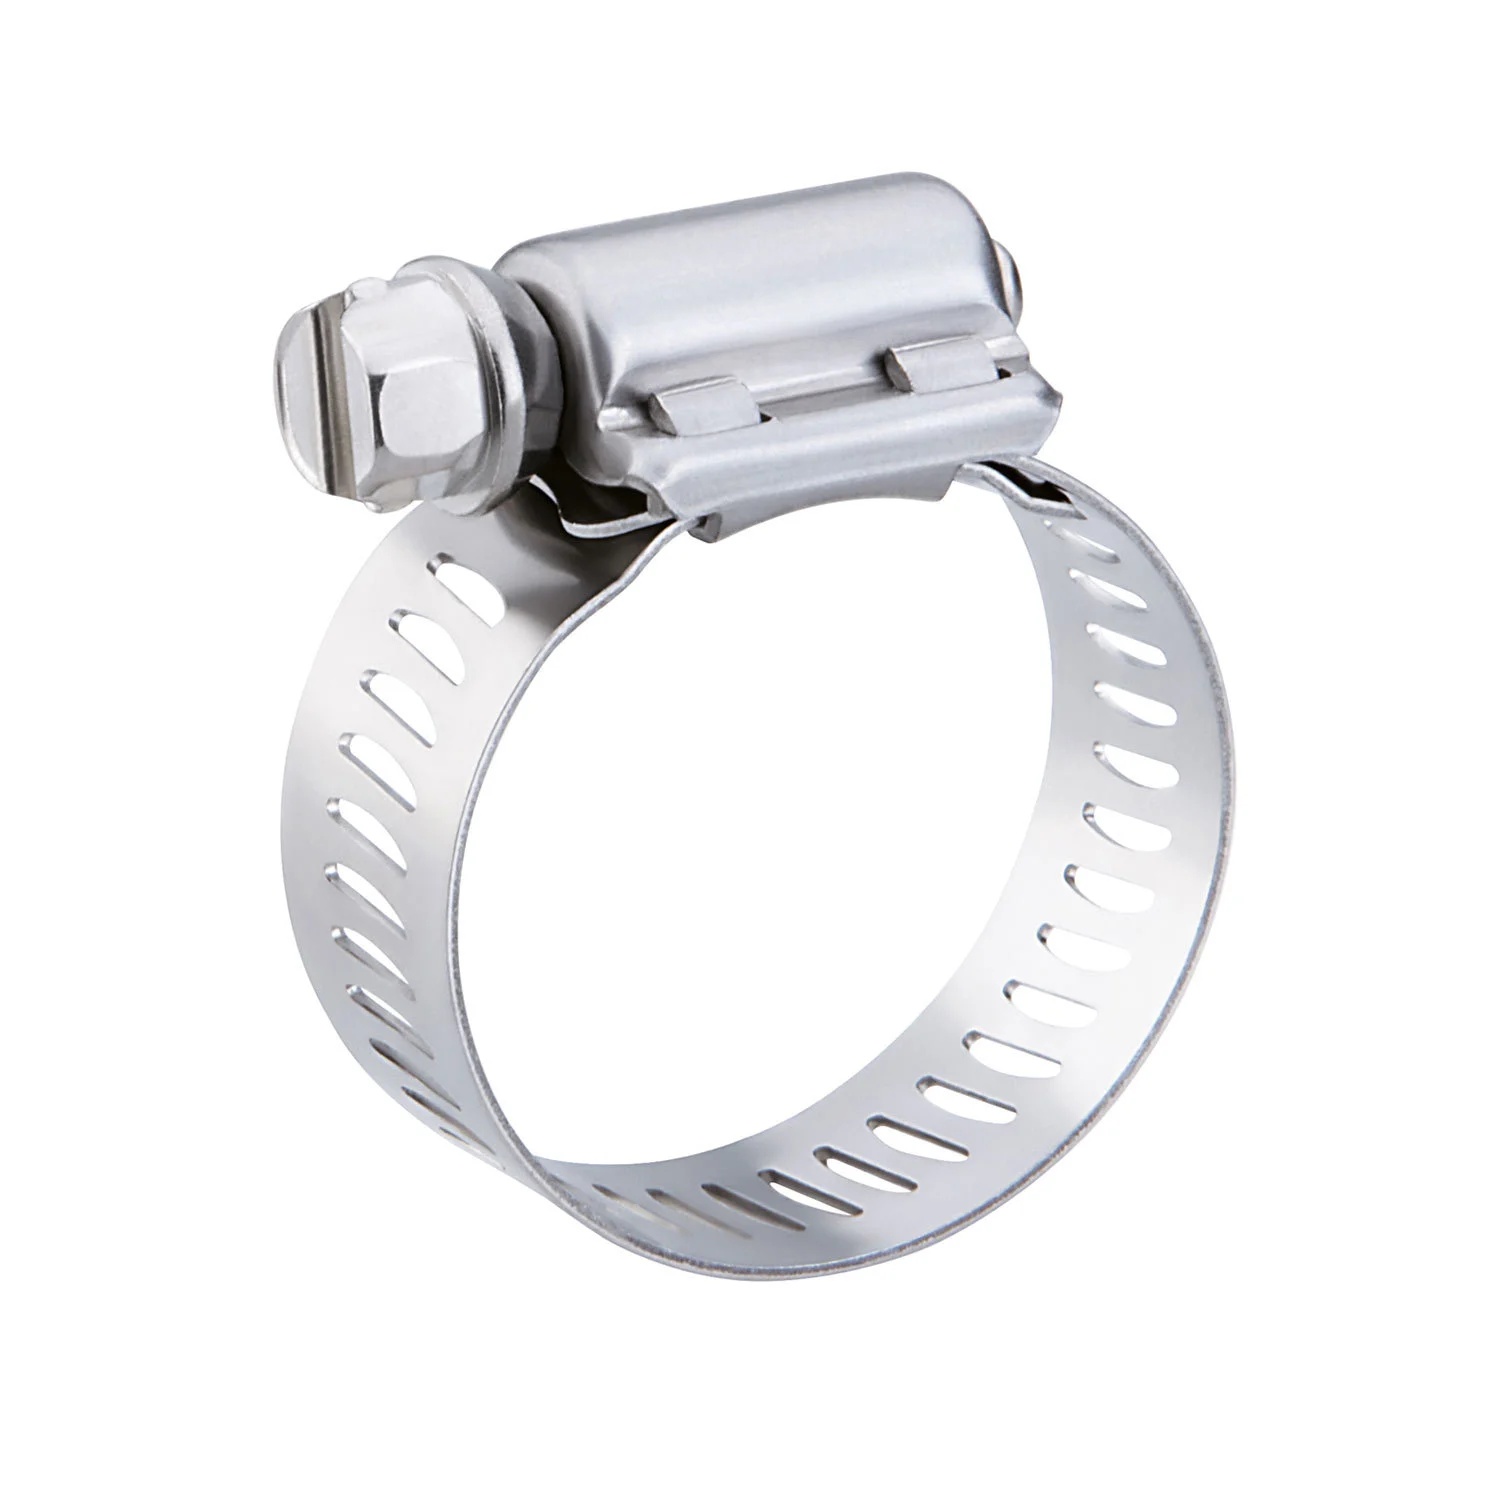
Common clamp types and where they actually belong
Clamp Type Typical Materials Typical Uses Why Choose It When Not to Use Worm-gear (hose) clamp Steel (zinc plated), 304/316 SS Small hoses, plumbing, low-temp systems Cheap, flexible, easy fit High vibration or high temp T-bolt clamp 304/316 SS, carbon steel Turbo hoses, high pressure lines Strong clamp force, resists loosening Small hoses, tight spaces Ear (Oetiker) clamp SS Small dia hoses, tamper-evident Compact, permanent If you need re-use or adjustment Rubber-lined pipe clamp Steel + EPDM/NBR Vibration-sensitive lines, coated pipes Protects coating, reduces noise High temp beyond rubber limits Repair clamp Steel + gasket (EPDM) Emergency repairs on buried pipes Quick seal, minimal tooling Permanent solution for high pressure Pipe support clamp HDG steel, SS Suspended pipe, HVAC Structural support, various mounts Wrong if load not specified Manufacturing realities — where quality slips happen
A clamp looks simple. But manufacturing contains many steps and each one can introduce problems if poorly controlled:
- Raw material inspection — factories should have incoming testing (chemical composition and tensile checks). If they don't, belts and bolts may come from mixed batches.
- Stamping & tooling — worn dies give variable hole patterns and inconsistent diameters. Ask about die life and maintenance frequency.
- Welding and assembly — poor welds are failure points on heavy clamps. Check for undercuts, inconsistent bead, and missing fusion.
- Surface finish — thin plating flakes or patchy galvanizing is common in cheap lots. Salt spray testing logs are your friend.
- Elastomer bonding — rubber pads that come loose or degrade quickly point to poor adhesion or wrong compound. If your clamps include cushions, insist on adhesion test results.
When you inspect a supplier, ask to see evidence at each step. Don't rely on photos emailed at the last minute.
Testing and documentation you should demand
Let me be blunt: if the supplier says "we test everything," ask for proof.
- Material Test Certificates (MTCs) — for every batch. No MTC = no go on critical projects.
- Salt spray test reports — for plated and galvanized clamps, particularly important for outdoor use.
- Dimensional inspection — sample measures against drawing tolerances; request CMM data for close-tolerance parts.
- Torque testing — for worm-gear and T-bolt clamps, torque retention tests show whether a clamp will hold under vibration.
- Batch numbering and traceability — ensure every shipment references batch numbers so you can trace back if an issue arises.
Make these tests contractual. If the supplier balks, treat that as a red flag.
How to run a good supplier evaluation (onsite or remotely)
If you can visit the factory, spend time in production, not just in the meeting room.
- Check tooling and spare dies — a well-organized tool room with maintained dies signals repeatable production.
- Watch an operator run a line — are IPQC checks performed? Is there a torque gauge, a salt bath log?
- Ask for live test reads — have them show a torque test on 5 random clamps, and record the results with you watching.
- Look at plating tanks and records — plating bath chemistry and renewal cycles matter. Ask about thickness readings they take.
- See their QA documentation — incoming inspection logs, IPQC hold points, FQC checklists — are they used or just present?
If you can't go, use third-party inspection firms or request a live video walk with a QA person showing serial numbers and test readouts.
Procurement tactics that actually reduce risk
Buying smart is about process. These are the tactics I've seen work repeatedly:
- Sample first, then pilot batch. Start with small runs. Fit samples into your actual assemblies. Don't just accept bench tests.
- Stage payments to milestones. Hold back a portion of payment until after verified inspection. This gives you leverage.
- Split orders across two suppliers. For critical spares or project runs, dual sourcing prevents single-point failure.
- Specify acceptance tests in the contract. Define sampling plans (e.g., 5% C=0 plan) and rejection criteria. Make the supplier pay for rework if rejected.
- Keep a safety buffer. Lead times fluctuate — keep a small strategic stock of the most used clamp types.
- Lock in spare parts and packaging specs. Ask for spares and consistent packing to prevent damage in transit.
A pilot run that nails the fit and finish is worth the extra time and cost. It stops a lot of downstream headaches.
Inspection checklist — short, usable at gate or on arrival
When inspection time comes, use this concise list:
- Measure ID and band thickness on a random sample.
- Check bolt threads and nut fit; verify torque range.
- Inspect welds under a bright light for cracks or splatter.
- Check rubber lining adhesion — try a small peel test on a sacrificial item.
- Visually inspect plating; if suspicious, request coating thickness readings.
- Do a functional test: clamp a sample hose and apply an appropriate pressure or vibration test if possible.
Photograph everything. Store those photos with invoice numbers. It's invaluable if disputes occur.
Packaging and shipping: small details that cost you tons later
Clamps get bent and surfaces get scratched in transit. Make sure packaging is not an afterthought:
- Stacking trays or cardboard separators prevent nested deformation.
- Plastic film or wax paper between clamps reduces galvanic pitting during long shipments.
- Labeling: include part number, batch number, material spec on every carton.
- Container load plan: for large orders, ensure crates are well braced to prevent shift.
If the supplier uses flimsy packing, you'll pay later in rework and rusted parts.
Typical field failures and how to avoid them
Here are recurring failures and the prevention measures that actually work:
- Flaking plating and rusting — cause: thin plating or poor surface prep; fix: require hot-dip galvanizing or thicker plating and ask for salt-spray test reports.
- Loose fasteners under vibration — cause: wrong type of clamp or missing locking feature; fix: use T-bolt or vibration-resistant fasteners for those runs.
- Rubber pad detachment — cause: poor bonding or wrong compound; fix: specify the elastomer and require peel/adhesion test.
- Over-tightening damage — cause: no torque specs; fix: include recommended torques in documentation and, if necessary, supply torque limiting tools.
Treat these not as surprise issues but as foreseeable risks — and write them into specs.
Lifecycle cost thinking
A cheaper clamp today can cost you more in three ways: increased maintenance, more frequent replacements, or production downtime. A simple lifecycle costing approach:
Total cost = Purchase price + Transport + Installation labor + Expected replacement frequency × replacement cost + Downtime cost per failure
If a stainless clamp lasts five times longer than a plated carbon steel clamp in your environment, the higher initial price is often cheaper in the long run. Build the math into your procurement decisions.
Real procurement language you can paste into RFQs
Here's a short RFQ snippet — drop it into your next inquiry to make specs unambiguous:
- Material: 316 stainless steel band and housing; carbon steel fasteners with pentaphosphate passivation (if carbon steel is accepted). Provide MTC per EN 10204 3.1.
- Coating: Hot-dip galvanized minimum 80 µm (where galvanizing is accepted); provide salt spray test report (ASTM B117, hours).
- Rubber lining: EPDM compound, shore hardness 60 ±5, max continuous temp 120°C; provide adhesion test data.
- Mechanical: Torsion/torque test results attached for worm clamps; tensile test for bolts per ASTM A193.
- Documentation: Batch traceability, packing list, C of C, and pre-shipment inspection report (third-party if requested).
- Packaging: Separated crates with plastic separators, anti-rust paper; label part no. and batch no. on carton.
This kind of language avoids ambiguous "stainless steel" or "quality plating" claims that mean different things to different suppliers.
When to involve third-party inspection
If you're running a critical project, use a trusted inspection provider. They can:
- audit the factory against your checklist,
- perform sample tests and produce an independent report,
- witness functional tests and confirm packaging.
Common providers: SGS, Bureau Veritas, Intertek. Their reports cost money — yes — but they save you from orders that would otherwise arrive non-conforming.
Quick decision flow for engineers (one page)
- Identify environment and stresses (chemicals, salt, temp, vibration).
- Choose clamp family (hose / T-bolt / pipe support / repair).
- Choose material (304, 316, HDG, or special alloy).
- Select rubber grade if needed (EPDM/NBR) and ask for compound spec.
- Run sample test: fit test + torque + visual + salt spray (if needed).
- Approve pilot batch, then stage larger shipments.
This flow keeps projects on schedule and avoids last-minute rework.
Checklist (what to include in your procurement approval)
- Sample acceptance signoff on your company letterhead.
- Pre-shipment testing clause and rejection criteria.
- Packing and labeling detail.
- Batch traceability and MTCs required.
- Spare parts list and guaranteed availability for X years.
- Delivery schedule (staged deliveries for large orders).
- Penalty clause for repeated late delivery (if project critical).
It's not glamorous but it's effective. Put these points into contracts and your procurement team will thank you later.
Practical, not ideological
Buying clamps from China can be straightforward if you approach it with an engineer's checklist rather than a buyer's shortcut. Focus on function and traceability, clarify materials and test requirements up front, run a pilot, and stage the main order. When you do this, the supply chain executes; when you don't, the supply chain surprises you — usually at the worst time.
-
How Can a Pipe Strap Factory Improve Installation Efficiency
Feb 13, 2026
How a Pipe Strap Factory Can Raise Installation Efficiency and Project Reliability
Pipe supports are a small part of visible construction, but a large part of what keeps systems working day after day. The choices made at procurement stage — the factory you choose, the product design, and the coordination of logistics — show up later as either smooth installation and steady operation or repeated adjustments and delays. A thoughtful approach to sourcing pipe straps and coordinating with a manufacturer reshapes the workflow on site, reduces friction for installers, and supports long-term performance across the piping network.
Why Pipe Strap Factory choice matters more than the part's size
It's tempting to think a strap is a strap, but in complex projects the differences accumulate. A consistent product reduces the number of decisions crews must make on the fly. When a supplier can deliver components that match specified dimensions, material expectations, and packaging preferences, site teams save time otherwise spent trialing, adjusting, or reworking parts.
Beyond the product itself, service matters. Clear drawings, straightforward labeling, and predictable lead times remove administrative friction. A supplier that provides clear communication about availability and shipment timing helps project planners sequence work in a way that keeps trades moving. In short, supplier capability affects supply chain stability, crew productivity, and ultimately schedule certainty.
Design details that make installation faster
On the ground, speed is less about raw pace and more about uninterrupted flow. Several product details shorten the time from "unpack" to "secure."
- Uniform fit and tolerance: Straps that are produced with consistent dimensions allow crews to assemble supports with minimal adjustments. When components snap together or match a standard installation jig, workers spend less time balancing and measuring.
- Tool compatibility: Designs that align with commonly used tools reduce the need for special equipment. If fasteners, clamps, or connectors can be used with standard hand tools, the process is smoother and fewer tool changes are required.
- Practical mounting features: Small features such as indexed holes, pre-formed bends, or intentional clearances for insulation and coverings remove the need for on-site shaping. These details reduce cut-and-fit tasks and contribute to quieter, safer installation sequences.
- Surface finish and handling: Surfaces that resist snagging, are easy to grip, and tolerate basic handling without immediate cosmetic damage reduce sorting time and speed up placement.
Focusing on these design elements pays back every day on site. They are the difference between a part that requires a minute of extra work and a part that slides into place without interrupting the rhythm of the crew.
Material choices and long-term performance
Material selection affects not only initial installation but also the lifespan and maintenance profile of the support system. The right material choice takes into account exposure, environment, and the function the strap must perform.
Materials should be evaluated for corrosion resistance, flexibility, and interaction with adjacent components. In environments where moisture or aggressive agents are present, materials that maintain integrity over time reduce the frequency of replacement and inspection.
Another consideration is compatibility with common protective measures: coatings, insulation wraps, or treatments applied later in the construction sequence. A material that accepts standard protective measures without losing dimensional stability or mechanical performance helps installation and long-term upkeep.
Avoid chasing single metrics. Instead, ask how a material behaves across a project lifecycle: storage, handling, installation, exposure, and routine maintenance. That perspective reduces surprises and supports more predictable long-term results.
Quality control: what to expect from a consistent factory
A factory that understands the realities of installation will embed quality practices into every production step. These practices include controlled dimensional checks, batch verification of finishes, and standard packaging procedures that preserve parts in transit.
From a purchaser's perspective, valuable indicators of reliability include:
- Consistent product labeling so crews can retrieve the right parts quickly.
- Clear packing lists that match what is in the crates to what appears on the order.
- Reusable or organized packaging that allows parts to be staged for specific areas without extra sorting.
- Evidence of production oversight in the form of routine checks and documented tolerances.
These elements reduce administrative overhead on site. A predictable product coming in predictable packaging speeds the handover from warehouse to install crew and minimizes inspection time.
Production capacity and the logic of rapid response
Projects rarely flow in perfect rhythm. Deliveries that arrive too early complicate storage and handling; deliveries that arrive too late stop work. A factory's ability to respond carefully to scheduling needs is critical.
Assess capacity in practical terms: look for suppliers who can scale up or arrange staged deliveries to match installation sequences. Reliable response also means contending with rush requirements in a way that doesn't sacrifice consistency. A supplier that handles scheduling proactively reduces the number of emergency orders and ad-hoc changes a project must absorb.
Supply chain resilience connects to wider planning. When primary sources face delays, secondary sourcing plans and inventory buffers preserve progress. Suppliers that coordinate logistics and give clear, early notice of constraints help project teams avoid reactive, disruptive decisions.
Logistics and packaging: small choices, big effects
Quality on the bench can be undone by poor packaging and labeling. Proper packaging prevents deformation, corrosion, and loss in transit. Furthermore, logical grouping and clear identifiers on crates make inventory handling efficient.
Best-practice packaging includes grouping parts by function or area, marking crates with installation location, and including brief instructions or a checklist that aligns with common site workflows. When crews can identify and stage a crate for immediate use, the project gains hours of productive time.
For large projects, consider asking suppliers for staged packing: deliver the exact sequence of materials needed for a particular phase rather than a bulk pile that must be sorted and reissued. This approach reduces handling and lowers the risk of installation errors.
Communication and technical support: how the factory can help on site
A responsive supplier doesn't end support at shipment. Useful assistance includes clarifying technical drawings, answering on-site questions, and offering simple guidance on assembly sequencing. Even a succinct installation tip from the manufacturer can prevent misinterpretation that leads to rework.
Technical support may also include providing a concise installation checklist or a one-page alignment guide that installers can carry to the job. These items are low cost for the manufacturer and high value for the installer.
Additionally, regular touchpoints during production and delivery phases build shared expectations. When project managers and factory representatives sync early and often, they minimize assumptions that cause delays.
Quality assurance on arrival: simple checks that pay off
When materials arrive on site, a few quick checks prevent problems later. A basic acceptance routine includes verifying the count, confirming obvious fitment, and spot-checking surface condition. These checks need not be elaborate — they're simply a practical way to catch major issues before installation begins.
If discrepancies exist, documenting them immediately and notifying the supplier accelerates resolution. Suppliers accustomed to these workflows will have established steps to remedy issues, whether reissue, replacement, or technical clarification.
Routine acceptance procedures become part of a disciplined site culture. They reduce the cumulative time lost to unplanned rework and preserve project momentum.
Storage and handling to protect product integrity
Even the best product can degrade with poor handling. On-site storage practices matter: keep components dry, off the ground, and in a location that reduces exposure to damage. Protect straps from heavy stacking, sharp edges, and contaminants that may affect finish or mechanical properties.
Label storage areas clearly and align them with project flow. Minimizing movement between storage and install reduces both labor and damage risk. A small investment in staging space and labeled zones returns steady time savings and fewer repair tasks.
Coordinating with other trades: choreography, not competition
Installation rarely occurs in isolation. The schedule and spatial needs of MEP trades, insulation teams, and finishers intersect. Coordinate support placement early to avoid conflicts and unnecessary rework.
Design decisions that consider integration with other trades — such as leaving clearance for insulation, planning around access panels, or routing for instrumentation — result in fewer late changes. A supplier that provides detailed drawings and is willing to discuss integration reduces clashes during the build phase.
Maintenance posture: how supplier thinking affects long-term upkeep
A factory that thinks beyond first installation adds value by helping specify supports that simplify inspection and maintenance. For example, access-friendly layouts, corrosion-resistant finishes, and straps that tolerate routine handling reduce the friction of upkeep.
When maintenance tasks are smoother, inspections happen more often and problems are caught earlier. Suppliers that account for these practicalities support lower life-cycle costs and less disruption to the facility in operation.
Sustainability and responsible sourcing
Sustainable production choices are becoming part of procurement decisions. Suppliers that minimize waste, use responsibly sourced materials, or provide recycling pathways offer project teams additional value. Sustainability is not just a marketing label; it is part of a project’s longer term cost and reputational picture.
Discuss production practices with providers: small improvements in packaging recyclability, process efficiency, or material sourcing cumulatively reduce the environmental footprint of a project. Many teams prefer partners who are transparent about these aspects and who can document their practices.
Contract terms and quality guarantees: what to include
When formalizing a supply relationship, clear contract terms protect both parties. Contracts should specify materials, tolerances, delivery expectations, and a mechanism to handle defects or shortages. Quality guarantees that define inspection windows, replacement modes, and dispute resolution reduce ambiguity.
Including a clause for staged delivery and simple remedy steps for nonconforming goods accelerates problem resolution. These practical provisions clarify expectations and reduce the time to remedy an issue, keeping projects on schedule.
Practical checklist for procurement and site teams
Below is a concise checklist procurement and site teams can use when working with a pipe strap supplier:
- Confirm material specification and finish expectations.
- Request staged packing aligned with installation sequence.
- Verify labeling scheme and packing list accuracy.
- Arrange brief technical alignment call prior to first delivery.
- Establish a simple acceptance routine on arrival.
- Reserve dedicated, protected storage near the installation area.
- Coordinate sequence with other trades to avoid conflicts.
- Agree on a remedy timeline for any nonconforming parts.
- Ask for a short installation checklist and any recommended handling tips.
- Maintain a communication channel for rapid clarifications.
This list keeps the focus on practical actions that reduce delays and support predictable installation rhythms.
Small improvements compound into major gains
The simplest improvements often deliver the largest, most reliable returns. Improving packaging, standardizing parts, and smoothing communication processes cost little but accelerate installation substantially. Factories that align production with on-site realities help project teams avoid the small, repeated inefficiencies that erode schedule and budget.
Choosing a supplier is an operational decision with downstream effects: on productivity, on maintenance burdens, and on the confidence of the workforce. A pragmatic, partnership-oriented approach — focused on predictable delivery, consistent quality, and clear communication — leads to steadier projects and less firefighting.
-
OEM Radiator Brackets: Reliable Manufacturing from JINYI
Feb 11, 2026
Many HVAC brands and distributors rely on OEM radiator brackets to ensure compatibility with their heating systems. OEM manufacturing allows customers to match bracket design, size, and load capacity to specific radiator models.
A reliable OEM supplier must offer more than production capacity. Engineering support, dimensional consistency, and quality control are equally important. Inconsistent brackets can cause installation problems and increase after-sales costs.
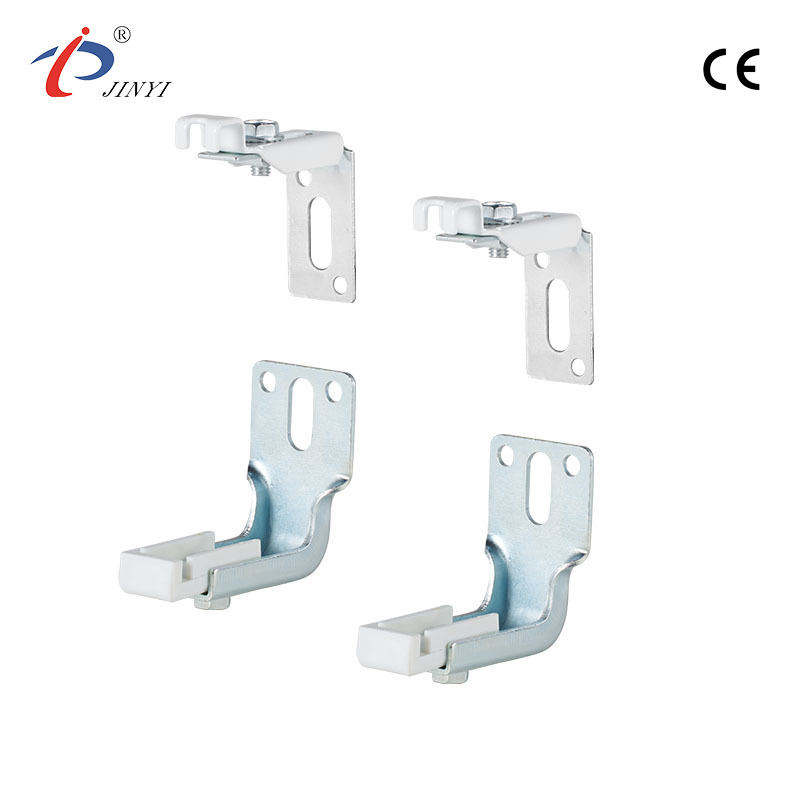
JINYI specializes in OEM radiator brackets and HVAC support hardware. Based on customer drawings or samples, JINYI provides custom solutions including radiator wall brackets, floor-mounted support brackets, and radiator top clamps. Materials and surface treatments can be adjusted to meet European project standards.
With stable supply capability and experience in export markets, JINYI helps customers reduce sourcing risks while maintaining competitive pricing. For HVAC brands looking to outsource radiator bracket production, a dependable OEM partner makes a real difference.Discover more about our products and global supply solutions at https://www.yh-jinyi.com
-
What to Consider When Buying Wholesale Pipe Clamps
Feb 09, 2026
Wholesale Pipe Clamp Buying: A Practical, No-Nonsense Guide for Buyers and Project Teams
A pipe clamp is, on paper, a small component: a ring, a bolt, maybe a rubber lining. On a construction site, though, clamps matter. They secure piping systems, control vibration, support insulation, and help ensure that joints don't fail years down the line. When you need hundreds or thousands of them, the quality of your supplier decides whether installation is smooth or whether crews face repeated rework.
Why one shipment can stop a project
A small anecdote before we dig in: a mechanical contractor once ordered 3,200 clamps for an eight-building project. Delivery showed up on time, but crews found many clamps had the wrong bolt length and the lining adhesive was peeling on a number of pieces. Fixing that problem required forklift time, extra hands, and a delayed commissioning for two buildings. The extra cost — in labor and schedule — beat any nominal savings the contractor had made on unit price.
That contractor's mistake wasn't choosing a cheaper supplier per se. It was failing to verify certain basic things: material certificates, pre-production samples, and a clear packaging plan. Those checks take a little time before ordering, and they pay off when product arrives.
What buyers usually check before placing a wholesale order
If you want a practical checklist, start here. These are the items that experienced buyers bring up in kickoff meetings.
Clear technical specs
Don't leave anything to interpretation. Provide pipe diameter ranges, operating temperatures, coating type, lining needs, and expected loads. Include drawings or photos if appearance or orientation matters. If you don't define tolerance, you get whatever the factory thinks is acceptable.
Pre-production samples
For significant runs, get physical samples from the same production process planned for your order. An actual sample reveals how the lining adheres, how the finish looks, and whether holes align with bolts and saddles.
Material certification
Request mill certificates for steel or stainless steel and datasheets for coatings and linings. For critical systems (chemical plants, hospitals, coastal installations), demand test results — salt spray, adhesion, and alloy traceability.
Packaging and labelling plan
Clamps dumped into a pallet with no labelling equal hours of sorting on site. Confirm how the factory will pack, label, and palletize. Ask for kits to include matching bolts, spacers, and washers if that saves on-site time.
Production and delivery timeline
Agree on staged deliveries if your project is phased. Confirm lead times and get a written delivery schedule tied to production milestones.
Quality control and traceability
Learn what in-process checks the factory performs and how they log batch numbers. Traceability helps you trace a field issue back to a batch or raw-material lot.
Warranty and defect handling
Know the process for dealing with defects. Who pays for return freight? How quickly will replacements be arranged? A good supplier has a documented approach.
These checks are straightforward and low cost. They prevent the "wrong product, on-time" problem which is surprisingly common.
How materials and order volume shape price
When you receive a quote, ask for the cost breakdown: raw material, processing, tooling and packaging. It’s surprisingly common for buyers to compare only the final unit price — without understanding the components behind it.
Material choices matter most
- Plain carbon steel with galvanizing is budget-friendly and fits many indoor applications.
- Stainless steel (e.g., 304, 316) costs more but resists corrosion in demanding environments.
- Special coatings (e.g., polyurethane, powder coating) add cost and processing time.
- Lining materials (EPDM, nitrile, PTFE) differ in price and in chemical resistance.
Match your choice to job conditions. Over-specifying for a benign environment wastes money; under-specifying for a corrosive environment shortens service life.
Design complexity increases cost
A clamp with integrated spacers, padding, or custom saddles requires more dies and likely additional manufacturing steps (welding, machining, pressing). Each added operation increases cost and tooling lead time.
Order volume drives per-unit price
Larger runs allow the factory to amortize tooling and set-up across more units. But be mindful of on-site storage limits. Ordering significantly more than you can store often creates handling and protection costs that erode the benefit of a lower unit price.
Hidden costs to watch
- Special fasteners or coatings that require separate sourcing.
- Extra packing for coastal transit or long storage.
- Customs or export paperwork that slows delivery and adds fees.
Ask for transparent pricing that lists these elements. It helps you make trade-offs intelligently.
Which industries commonly order wholesale pipe clamps
Knowing typical needs by industry helps you select suppliers with the right experience.
- Construction and HVAC: Favor cost-effective standard clamps, fast deliveries, and installer-friendly kits.
- Industrial process plants: Prioritize material certificates, high temperature ratings, and traceability.
- Marine and coastal projects: Need specific stainless grades and anti-crevice considerations.
- OEMs and equipment manufacturers: Often ask for private label runs and consistent product across batches.
- Utilities and district energy: Value tolerance for thermal expansion and repeatable configurations.
If you are in a specialized sector, ask the factory for references in that sector. A supplier who has shipped many similar projects will likely anticipate your needs better.
Why deliveries slip during peak seasons (and how to avoid it)
Construction peaks, weather windows, and large public projects can create predictable cycles of demand. Suppliers face several pressure points:
- Raw material availability: coil steel, fasteners, and chemicals for coatings can be constrained.
- Factory capacity: Tooling and machine hours are finite. Sudden demand spikes lead to rescheduling.
- Transport constraints: Port congestion or truck shortages add further delay.
- Labor shortages: Staffing peaks may force overtime or temporary hires, which can affect quality.
How buyers reduce risk:
- Share forecasted demand early and update it regularly.
- Schedule staged deliveries aligned with installation phases.
- Agree on alternative materials or finishes if primary supplies are constrained.
- Lock in tooling and production windows for custom runs.
Early planning is simple but effective. It smooths the peaks and keeps your site moving.
Practical ways to evaluate manufacturing consistency
You don't need a lab to get a sense of whether a factory controls production. These practical checks are effective.
Ask for production photos and videos
Request recent photos or a short video showing forming, welding, plating, and packing. A tidy, organized factory floor with visible QA checkpoints is a good sign.
Request test data and batch records
For critical jobs, ask for coating thickness measurements, adhesion tests, salt spray results, and bolt torque checks. Compare numbers across sample batches to see variability.
Get samples from separate runs
Ask for samples from different dates. If they vary visibly (color, finish, lining adhesion), the factory may have process drift.
Inspect how the factory handles tooling and dies
Tooling wear affects part dimensions. Ask about die maintenance schedules and replacement policies.
Audit traceability
Does the factory link each pallet to a batch number and raw material certificate? That documentation makes root-cause analysis practical if problems arise.
Factory transparency and willingness to share process evidence are strong reliability indicators.
Packaging, delivery sequencing and on-site handling
Good packaging isn't glamorous, but it is crucial. Damaged finishes, bent clamps or moisture-exposed lining material all cause rework.
Packaging best practices
- Separators or protective film between coated clamps to prevent abrasion.
- Moisture-proof packaging for lined or coated parts that will be stored outdoors.
- Clear labeling with size, installation zone and batch number.
- Pre-assembled kits with matching bolts, washers and spacers to reduce sorting.
Delivery sequencing
Staged deliveries aligned to installation zones or floors simplify storage and reduce double handling. For tight urban sites, small, frequent deliveries are better than a single large truck that blocks access.
On-site staging
Plan protected storage areas. Even coated clamps should not sit in prolonged rain or direct sunlight if liners can degrade.
Packaging and delivery planning save crews hours of manual handling — and save you money.
How to manage custom requests without adding chaos
Customization is normal: a project may require special saddles, integrated spacer blocks, or particular lining geometry. Manage it with structure.
- Engineering change control: A written sign-off on drawings, materials, quantities, and delivery dates reduces surprises.
- Pre-production validation runs: A small prototype batch confirms that tooling and adhesives work as expected.
- Tooling and MOQ clarity: Tooling costs and minimum quantities should be transparent from the start.
- Validation testing: Ask for tests that reflect field conditions (temperature cycles, chemical exposure).
Custom work thrives when expectations are documented and sample approval is mandatory.
Practical buyer's checklist (use this before ordering)
Here's a compact checklist to use with any factory quote:
- Do I have full technical drawings and material specs?
- Can the factory provide pre-production samples?
- Are material certificates and test reports available?
- How will products be packed and labeled? (Ask for photos.)
- What is the production schedule and staged delivery plan?
- How does the factory perform in-process quality checks?
- What is the traceability approach (batch numbers, raw material codes)?
- What are lead times and contingency plans for delays?
- Are warranty and defect processes documented?
- Can the factory provide references for similar projects?
Use this list during supplier evaluation. It reduces procurement risk and sets clear expectations.
Practical answers for common buyer questions
How many samples should I request?
Ask for at least three samples from different runs if possible. One sample from tooling, one mid-run, and one near the end of a small validation batch gives visibility into consistency.
What is a reasonable lead time?
For standard clamps, 3–6 weeks is common, depending on order size and a factory's backlog. Custom tooling or special treatments add time. Always get written timelines.
Should I visit the factory?
If the order is large or the application critical, a visit helps. If travel is not feasible, request a live video tour and recent batch records.
Can I reduce cost by compromising on coating?
Only if the environment allows it. Underestimating corrosive exposure leads to early failures. Match coating and materials to conditions rather than simply reducing cost.
Building a long-term supplier relationship
A one-off transaction is different from a multi-project partnership. For repeat buys, invest in the relationship.
- Share rolling forecasts so the factory can plan materials and capacity.
- Hold quarterly reviews to discuss quality trends and continuous improvement.
- Exchange installer feedback to refine product details that save time on site.
A factory that knows your projects becomes proactive, recommending small design changes that save cumulative hours during installation.
Choose for predictability, not just price
In the end, wholesale pipe clamps are a lesson in systems thinking. A cheaper unit price might cost you days on a job. A reliable partner gives you consistent parts, transparent processes, and predictable deliveries. The small upfront time you spend vetting suppliers — samples, certificates, photos, and a short packaging plan — pays off when bolts go in and systems hold without drama.

![]()
- 210 Jinhai Avenue, Lupu Economic Development Zone, Yuhuan City, Taizhou City, Zhejiang Province.
- +86-576-87423248 / +86-576-87499120
- +86-17769979117 / +86-13750801289
- +86-576-87425996
- [email protected] / [email protected]

